

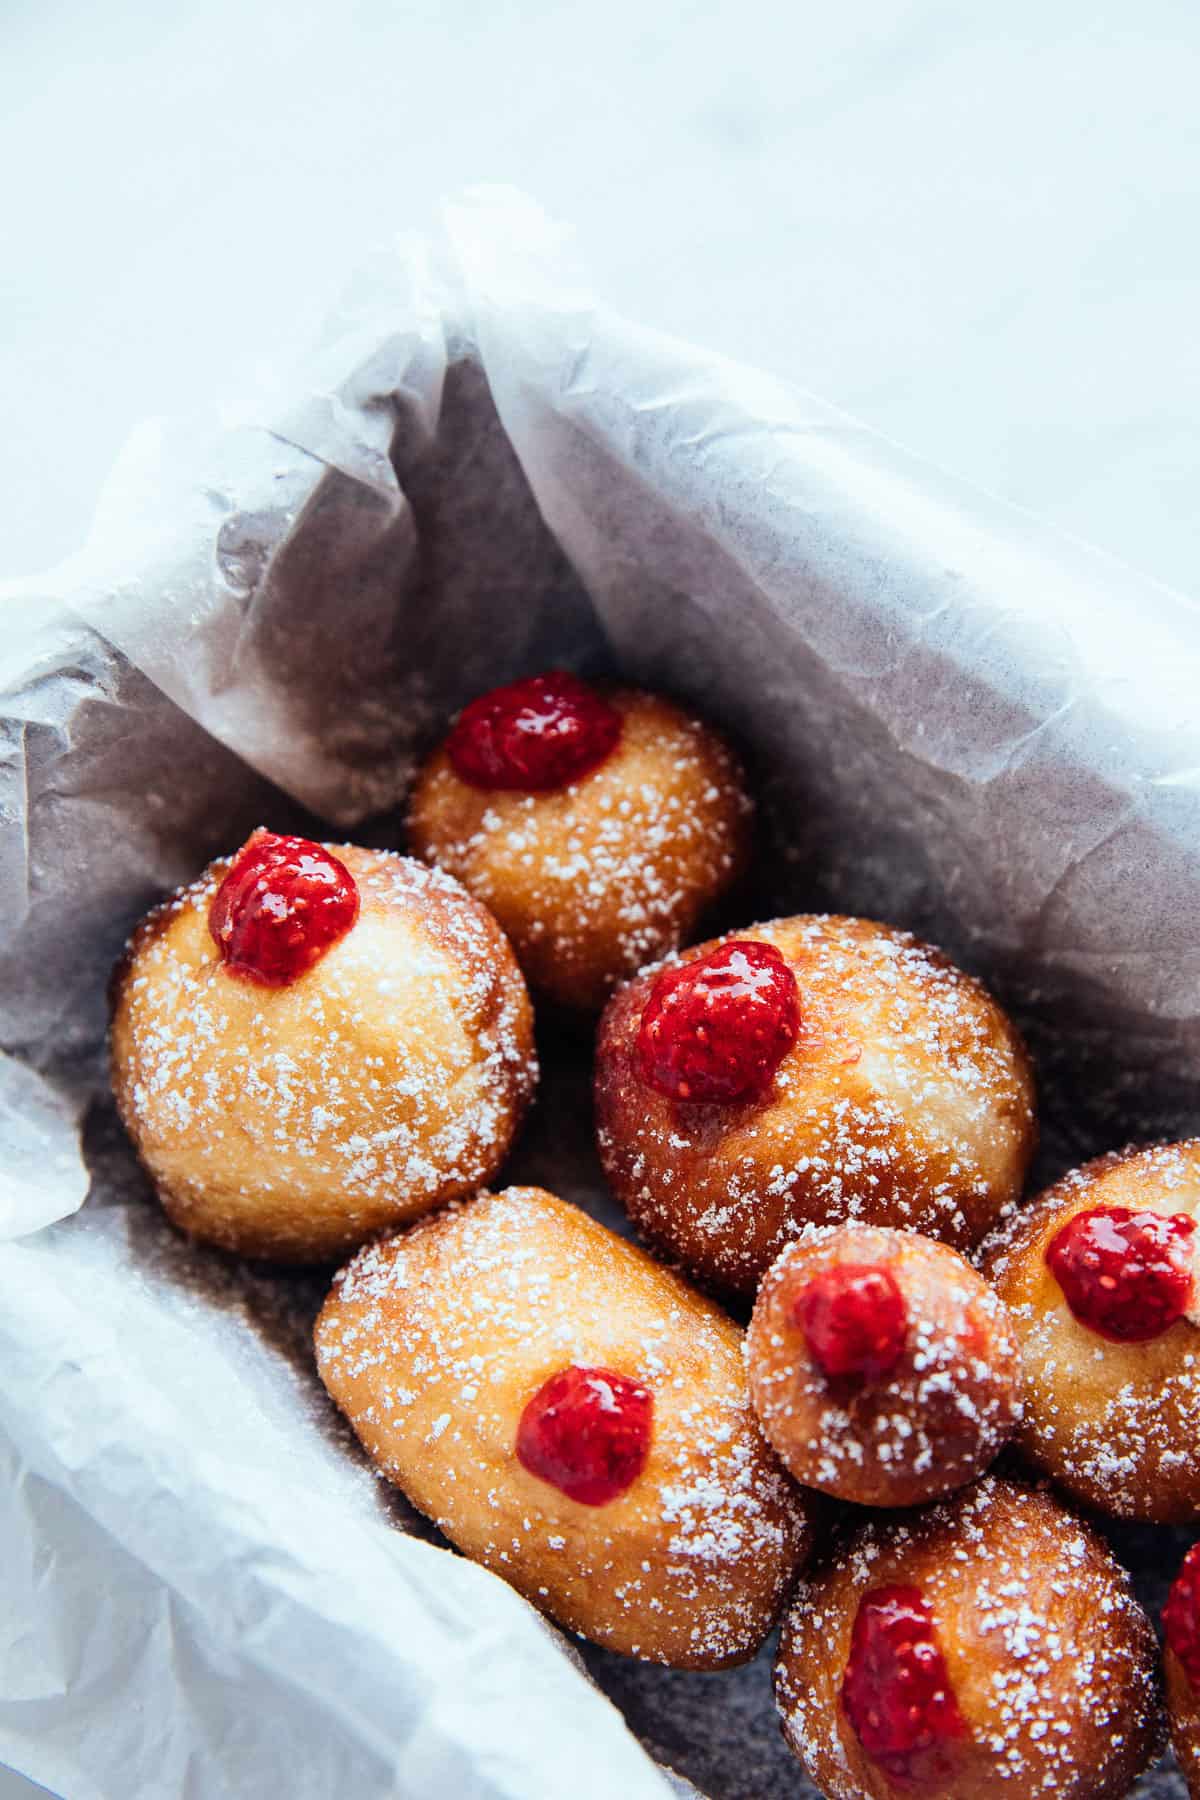
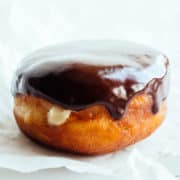
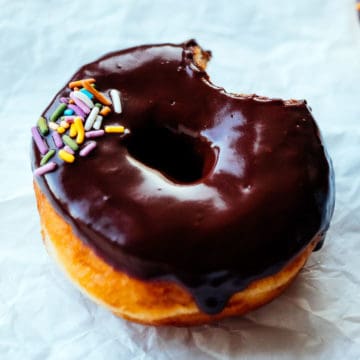
These raised vegan jelly doughnuts are filled with strawberry chia jam and dusted with powdered sugar! Super soft yet chewy, these vegan sufganiyot are perfect to serve during Hanukkah!
Jump to:
🍓 Sufganiyot (Jelly Donuts)
The humble jelly doughnut is classic for a reason... it provides a fruity zing to cut through all that sugar.
And similar to its glazed cousin, jelly doughnuts are very simple to make!
You may also have heard of jelly doughnuts being referred to as sufganiyot—which means donuts in Hebrew. Sufganiyah (singular-version) is a round jelly doughnut that originated in Israel. It's especially popular during Hanukkah!
Some chefs posit that a donut needs to be prepared a bit differently to truly be called sufganiyot. I make them using our tried and true yeast-risen dough.
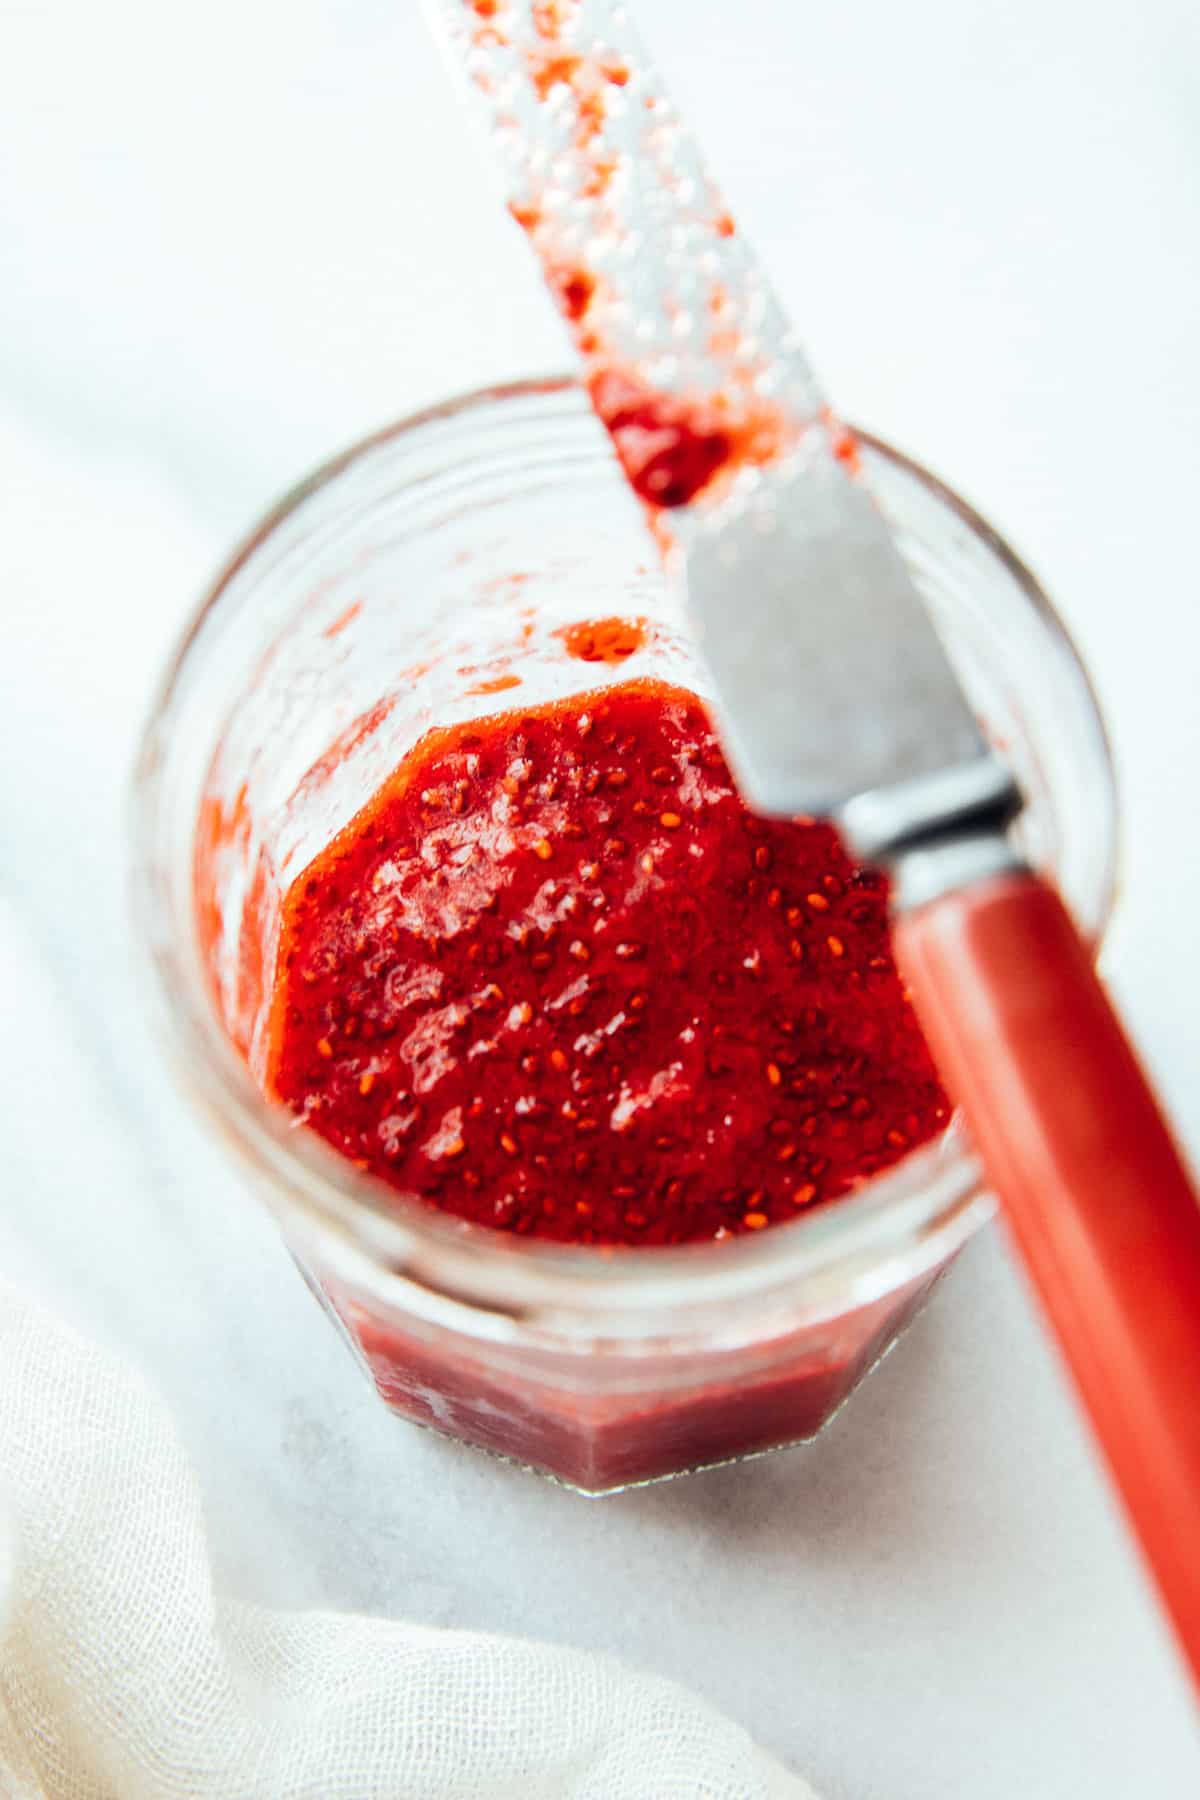
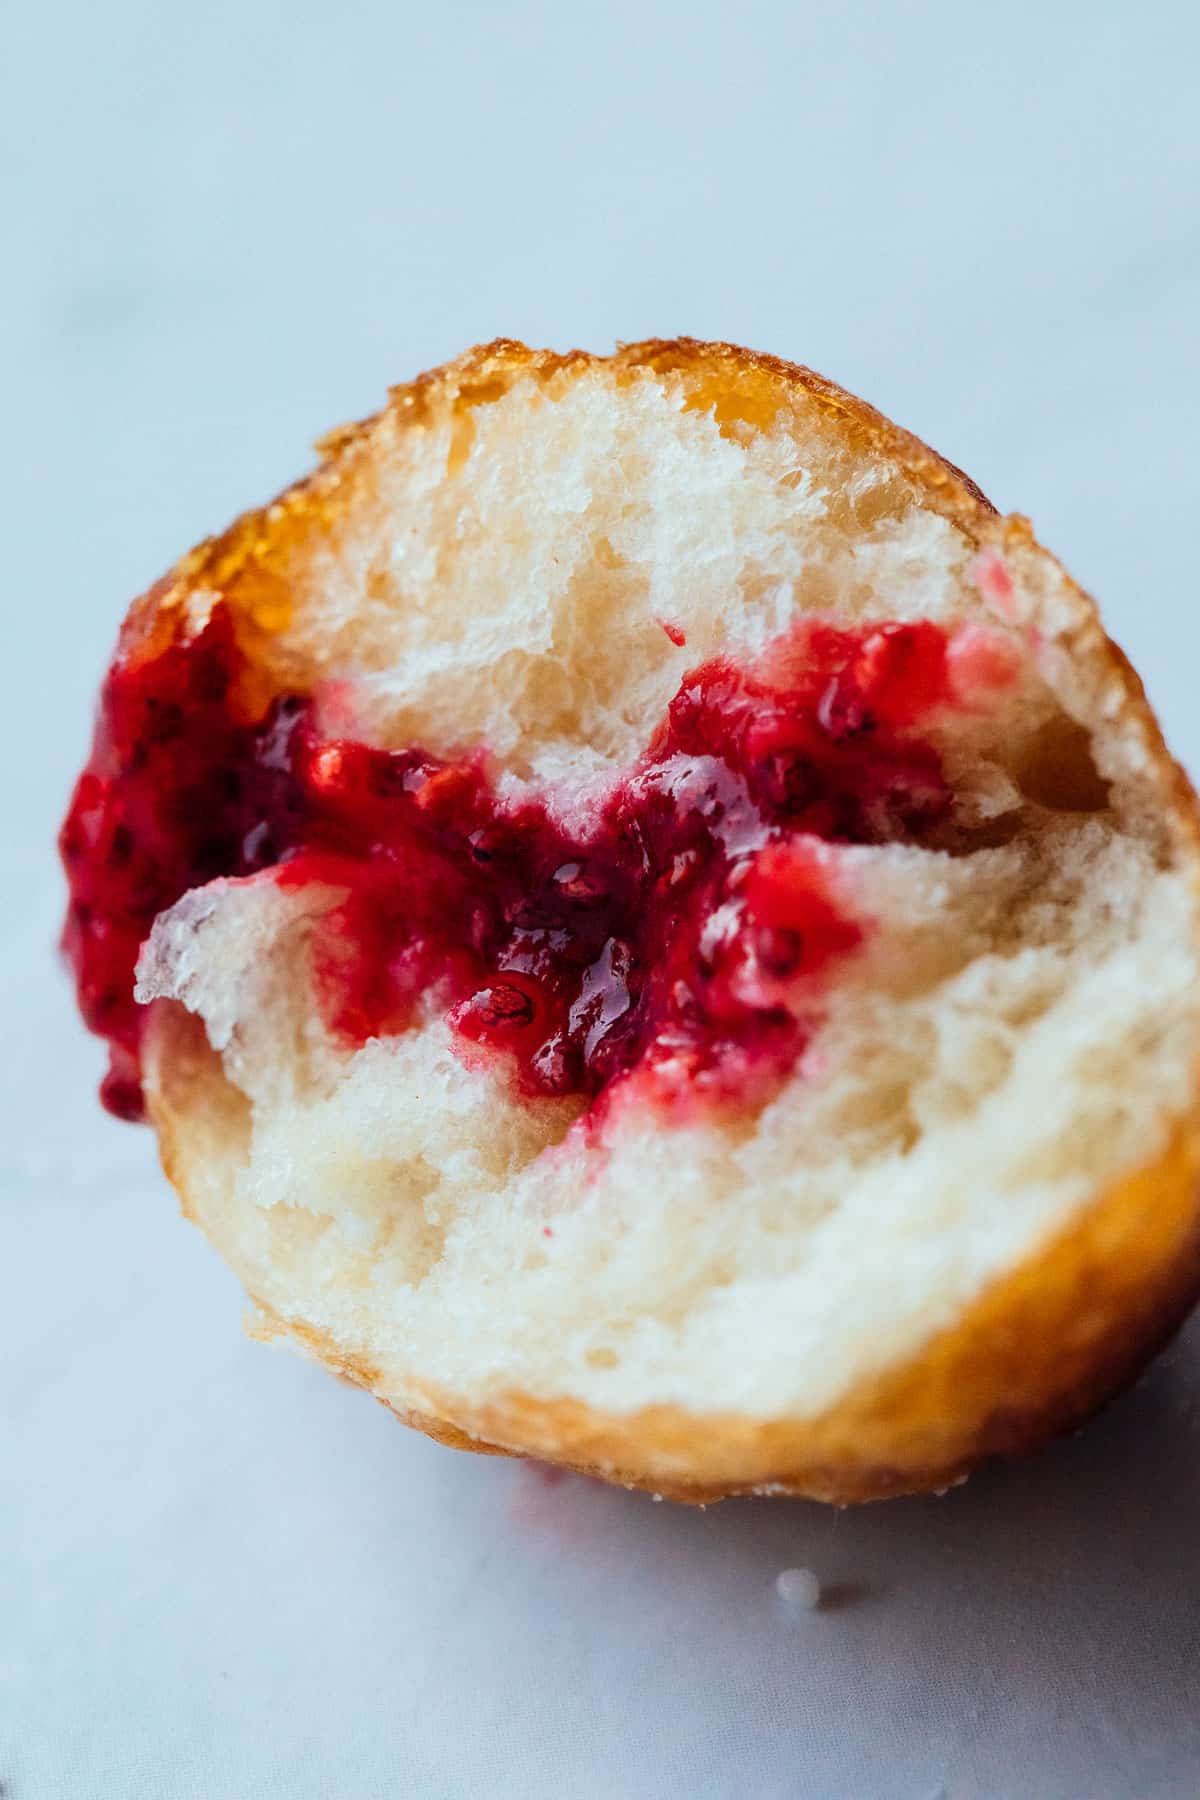
Also... I love to fill my doughnuts with homemade berry chia jam. It tastes so much fruitier, and has a lot less sugar than regular jelly. Not to mention cheaper.
Of course, we're not going for healthy with a fried doughnut recipe... but this filling certainly makes it healthier than most. Let's begin!
🍯 Ingredients
Yeast Doughnuts
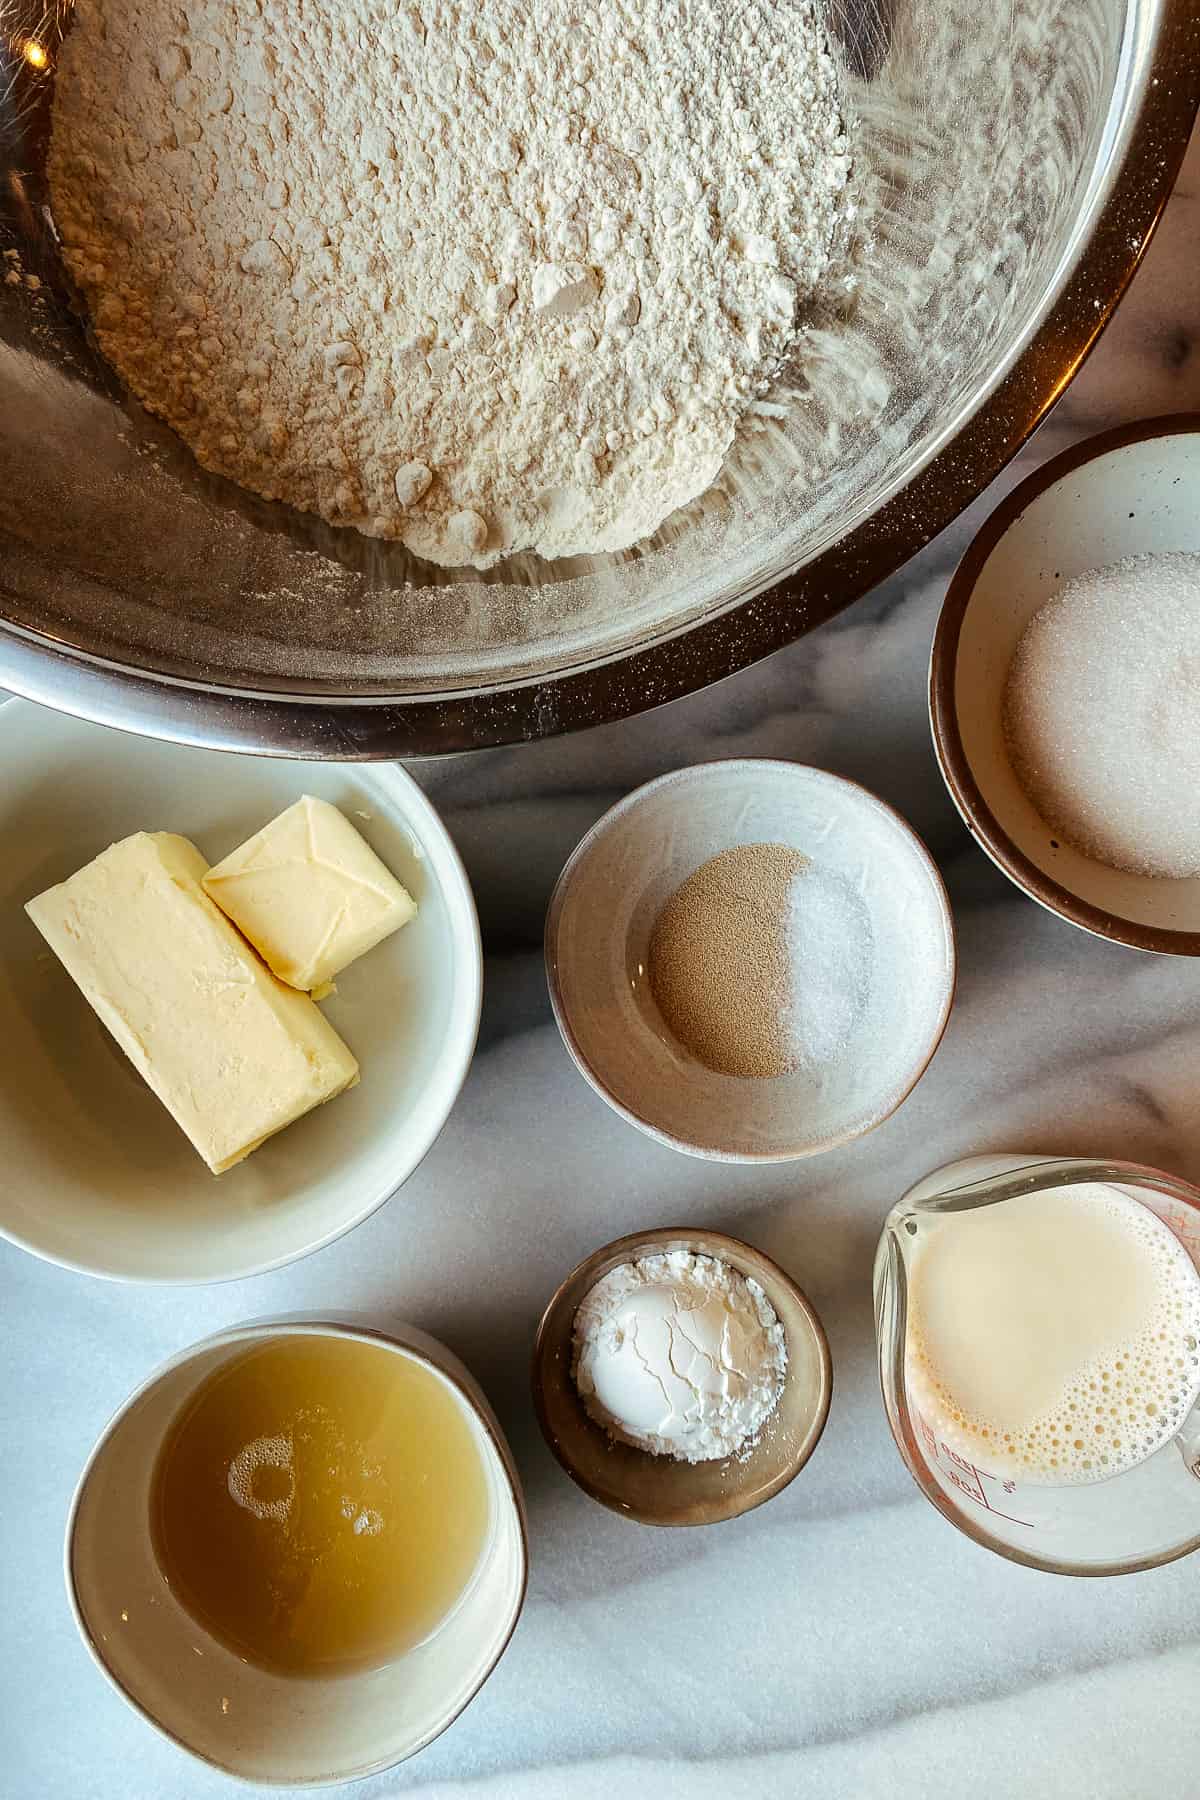
- All-Purpose Flour: I used King Arthur's unbleached AP flour that has 11.7% protein content. You may also use bread flour which is higher in protein and therefore provides more elasticity to the dough to trap more air pockets and make the doughnuts even softer.
- Instant Yeast: Feel free to use active dry yeast as well. In either case, make sure the yeast isn't expired and still alive.
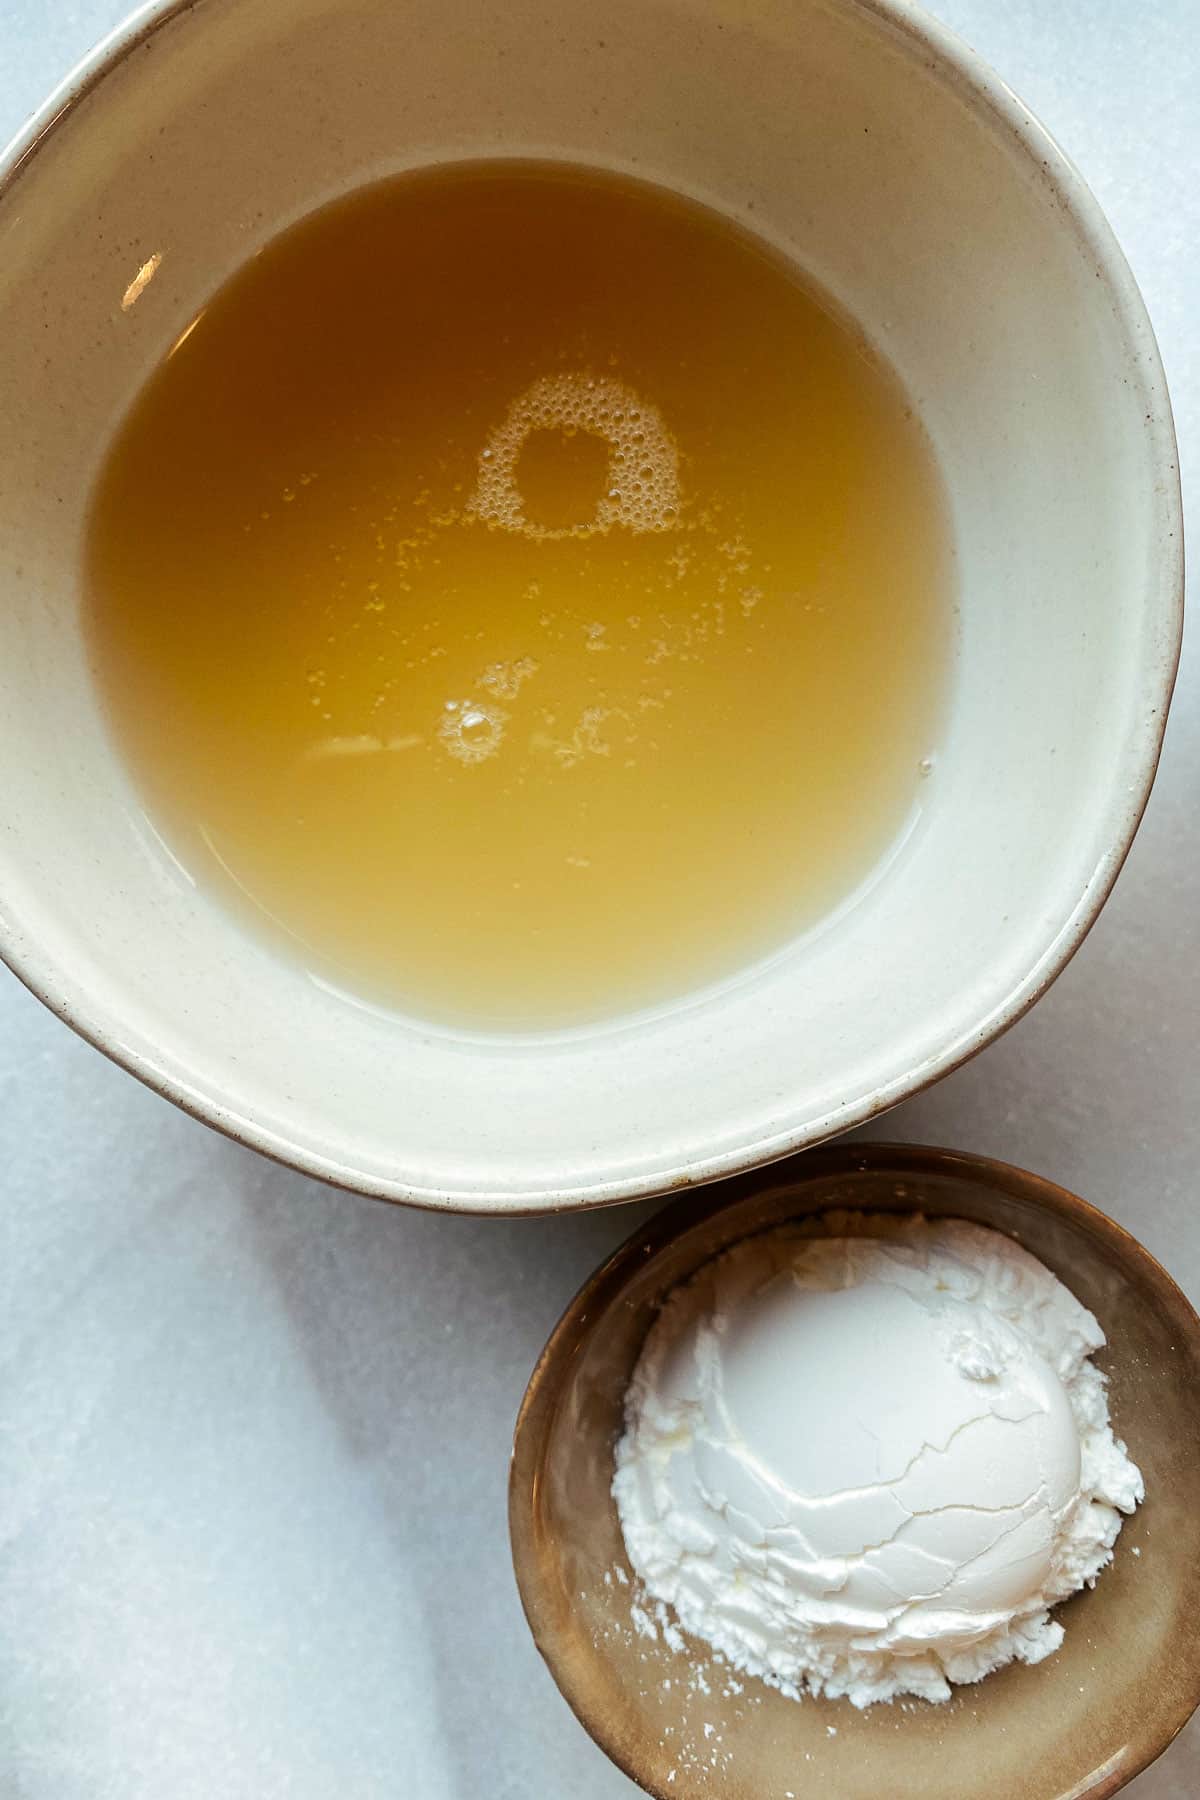
- Aquafaba: This diluted "chickpea broth" has dissolved starch and saponins which will slow the collapse of foam and provide stabilization.
- Cornstarch: Aquafaba isn't a great binding agent on its own so we need to add another source of starch. You may use arrowroot starch (double the weight) instead if necessary.
- Sugar: We'll use granulated sugar. For a 100% vegan donut, pay attention to the kind of sugar you're using. In the U.S., the sugar will definitely be vegan if it's organic, “unrefined”, or made from beets.
- Salt: The recipe is written for regular table salt. Double the volume if using Kosher (same weight).
- Non-dairy milk: I use soy milk where the only ingredients are soybean and water. Any unflavored, unsweetened plant milk should work. Just be mindful of options with strong aromas such as coconut milk as they may impart some flavor.
- Vegan Butter: Room temperature butter added towards the end of kneading will enrich the dough for more fluffy doughnuts. I used Earth Balance salted sticks. If using unsalted butter, add a pinch more table salt to the dough.
- Frying Oil: Using an oil with a high smoke point is essential. I used vegetable oil. Safflower, peanut, soybean, sunflower, or canola oils will work as well.
Homemade Berry Chia Jam
It takes less than 30 minutes to make this chia jam, but it needs to gel for at least one hour before using.
Of course, you can use any jam or jelly you prefer instead! Just make sure it's runny enough so as not to block the piping bag.
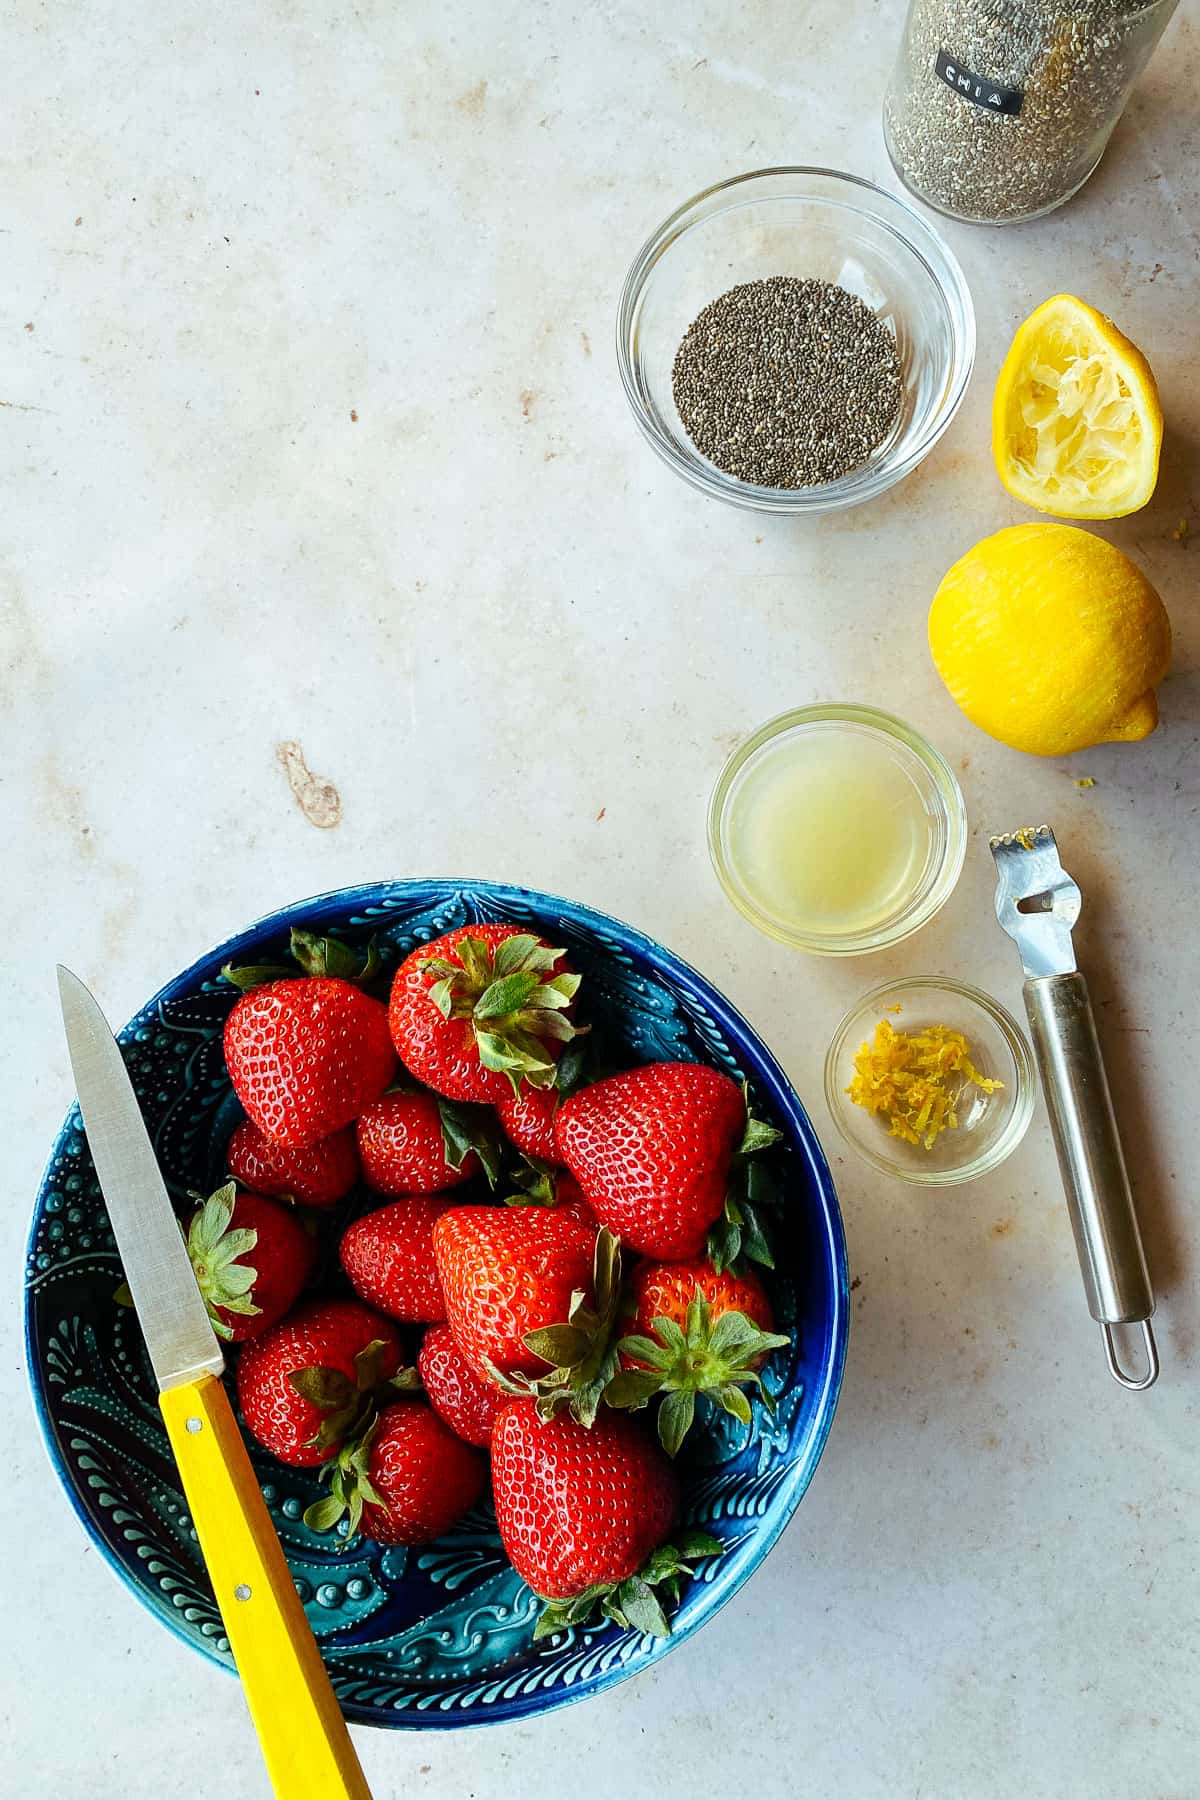
- Fresh or Frozen Fruit: If this is your first time making chia jam, you can't go wrong with classics like strawberry or raspberry. Peeled apricots, nectarines, blueberries, blackberries, figs, or a tasty combination of your favorites are all good ideas!
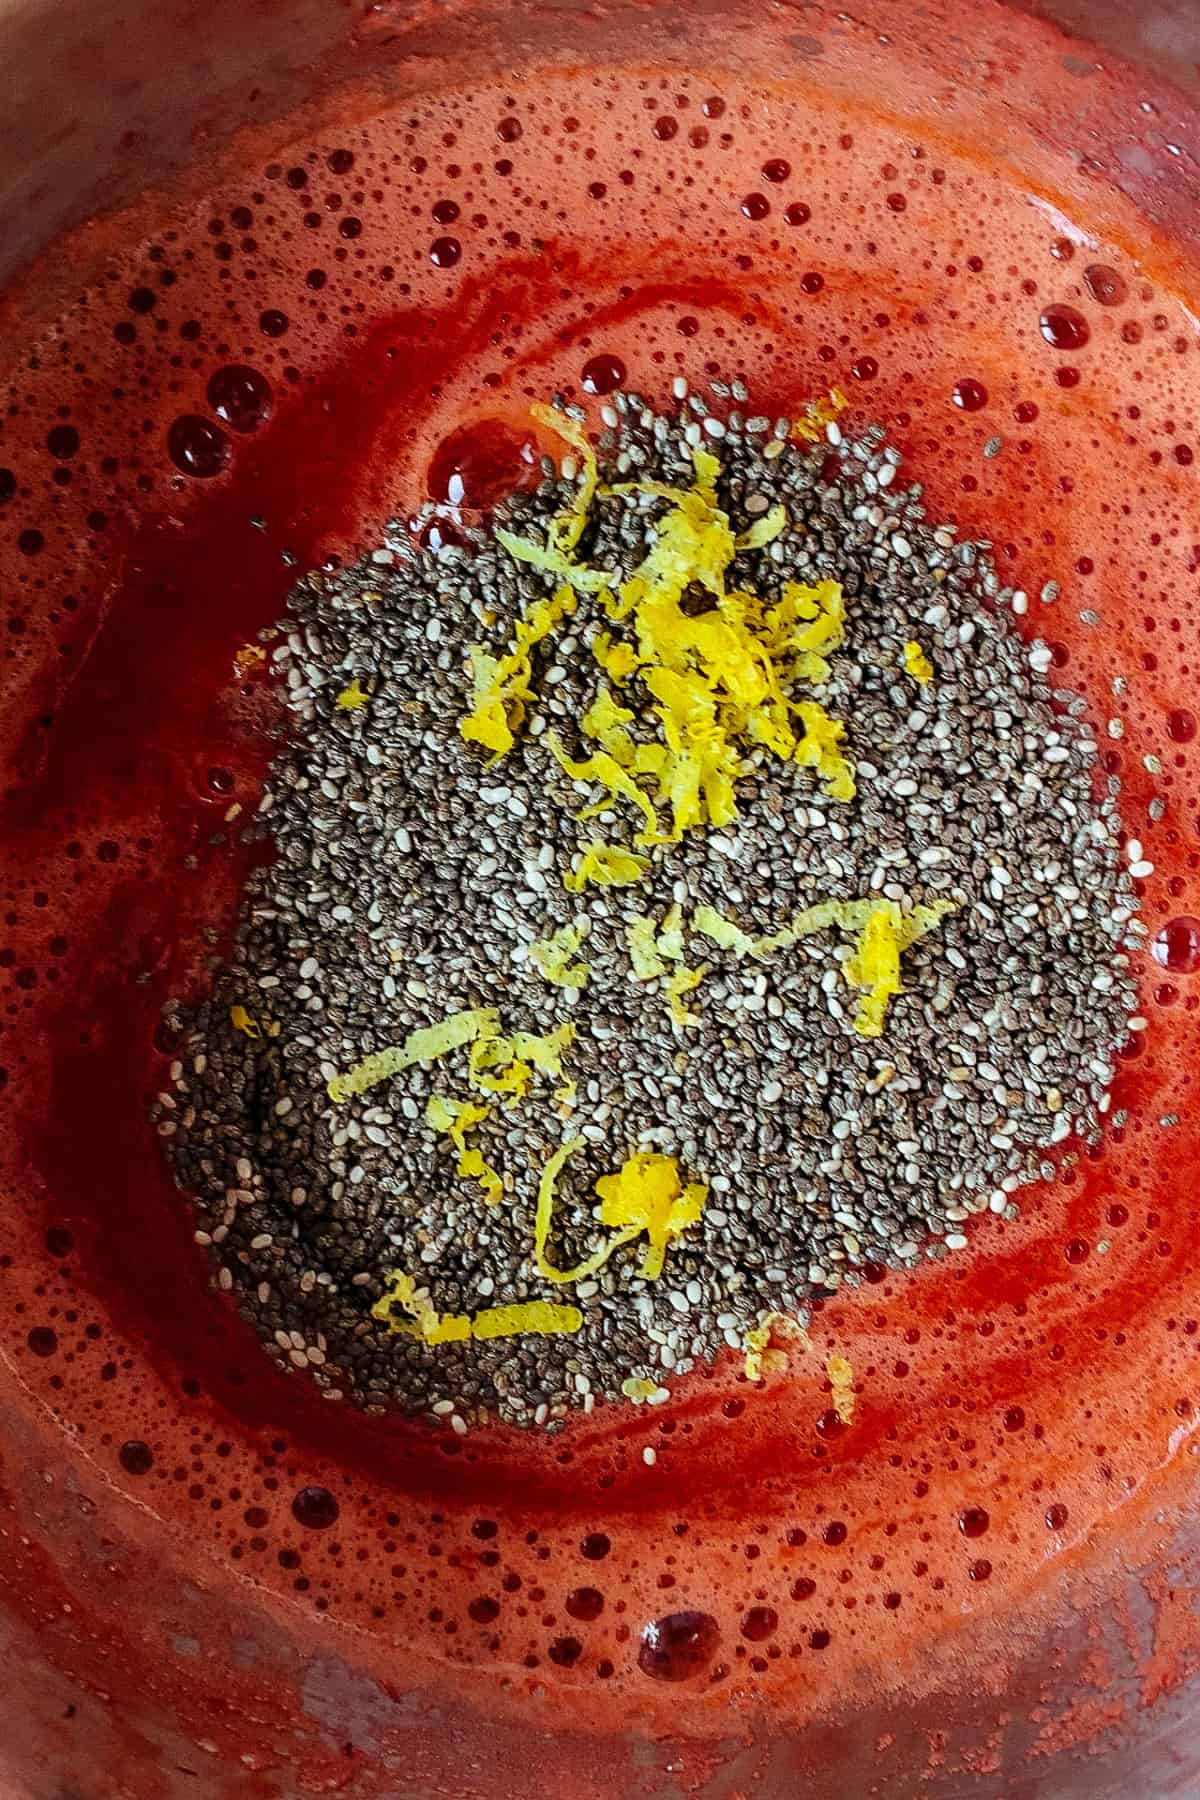
- Chia Seeds: Black, white, organic, conventional... any type of whole chia seeds will work.
- Lemon Juice: Need it for just a tad bit of acidity. Feel free to substitute with ¼ the amount in citric acid if you'd like.
- (optional) Lemon Zest: Adding citrus zest is completely up to you, but it certainly makes chia jelly tastier and more interesting.
- (optional) Maple Syrup: Chia jelly made of fruits that aren't naturally very sweet, such as raspberries, often needs a bit of sweetener to taste as best as it can. The amount will vary on the type and ripeness of the fruit. Start low and add as much as you think it needs.
Dusting
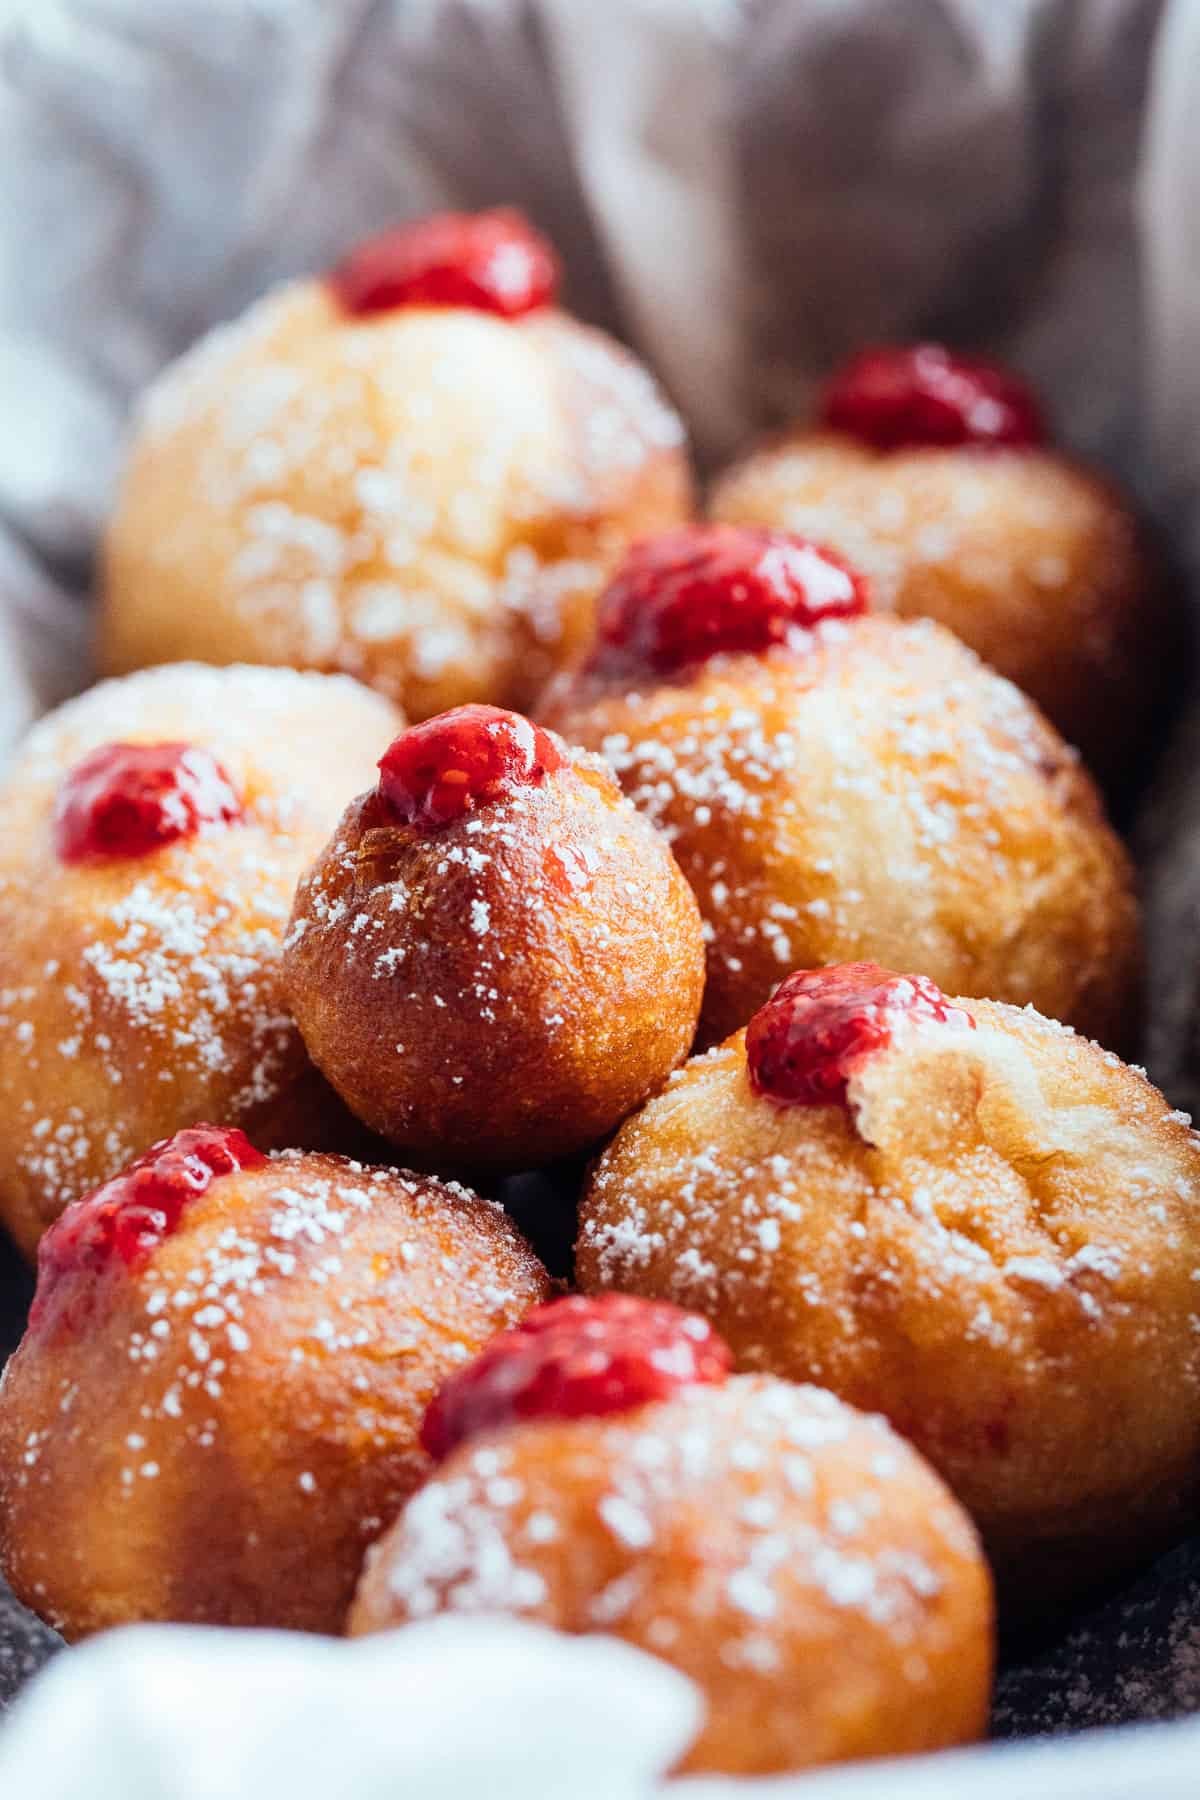
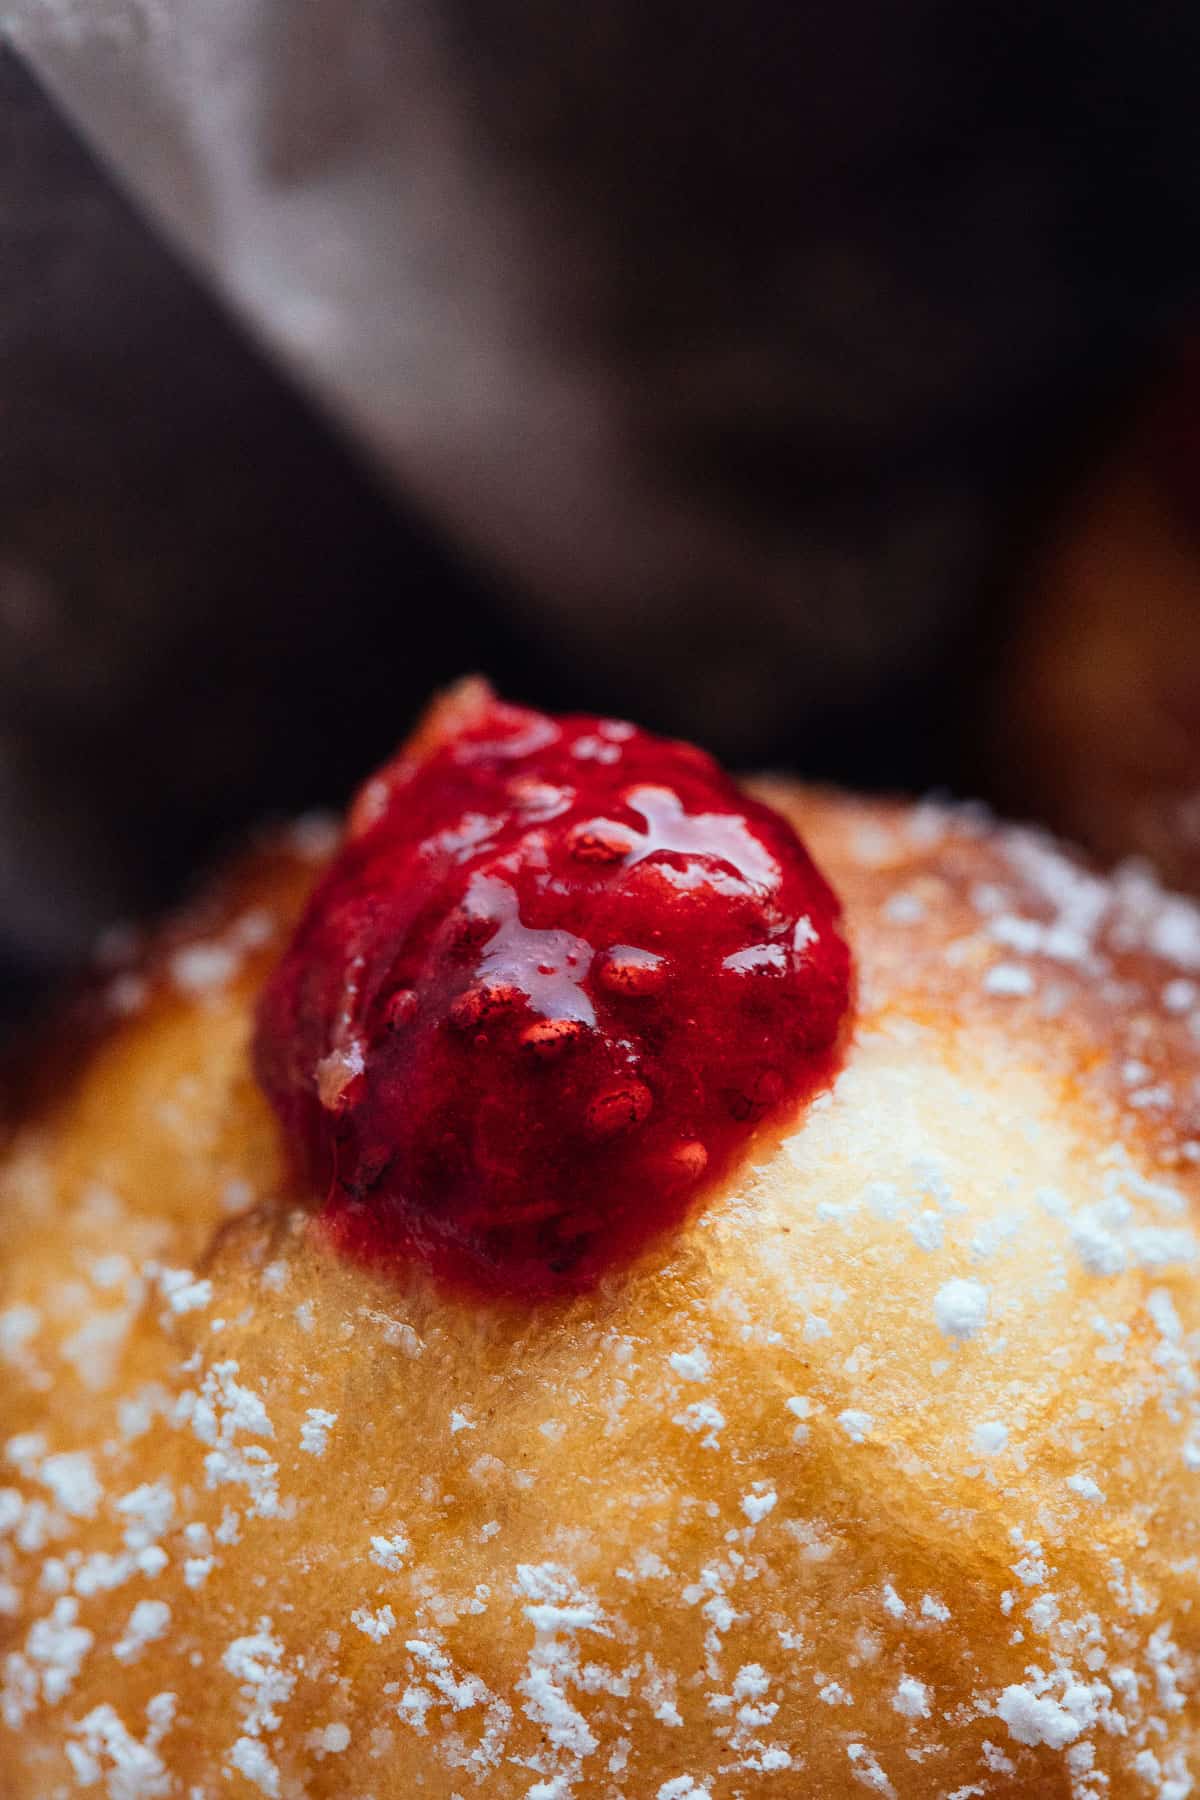
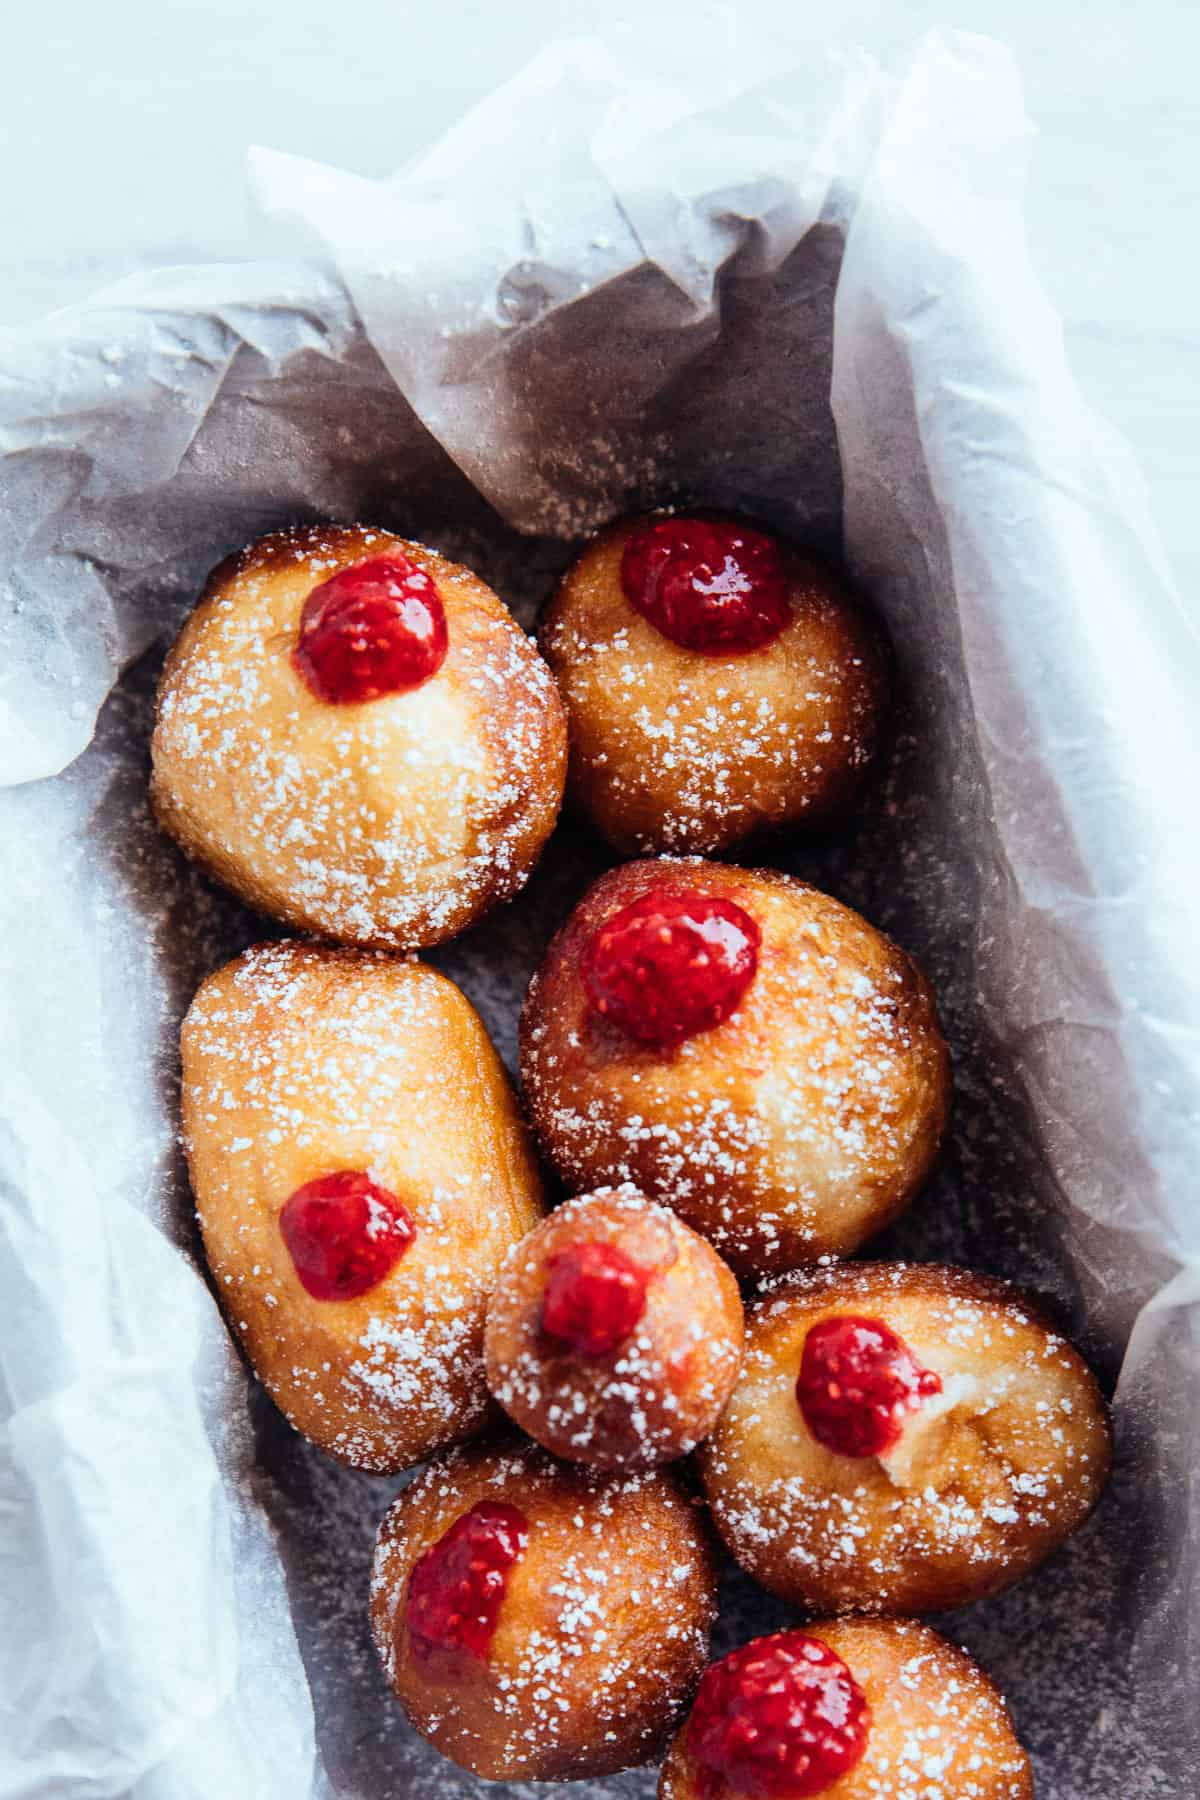
Finally, I like to dust these jelly doughnuts with powdered sugar to make them extra delicious. And extra pretty.
🥣 How to Make Vegan Sufganiyot
Make the Chia Jam
You can make the chia jam a few days ahead to break up the work if you wish. Make sure to keep in an airtight container in the refrigerator.
Make the Egg Replacer:
Mix the aquafaba with cornstarch and set aside.
Bloom the Yeast:
Mix the yeast with lukewarm water and 1 teaspoon of sugar; set aside until frothy.
Knead and First Proof:
- Place all dry ingredients (flour, sugar, salt) into a large bowl and make a well in the center. Pour in the aquafaba & cornstarch mixture, soymilk, and yeast mixture.
- Mix with a wooden spoon until the dough somewhat comes together. If you want an easier time kneading, let this coarse mixture rest for 30 minutes to autolyze.
- Knead for 10 minutes by hand until smooth, or 5 minutes with dough hook with a stand mixer. Add the softened vegan butter and knead for another 2 minutes to combine.
- Tear a piece of the dough and check if it passes the windowpane test. When the dough is stretched, you should be able to see light through it without the dough tearing. Otherwise, keep kneading to form more gluten bonds.
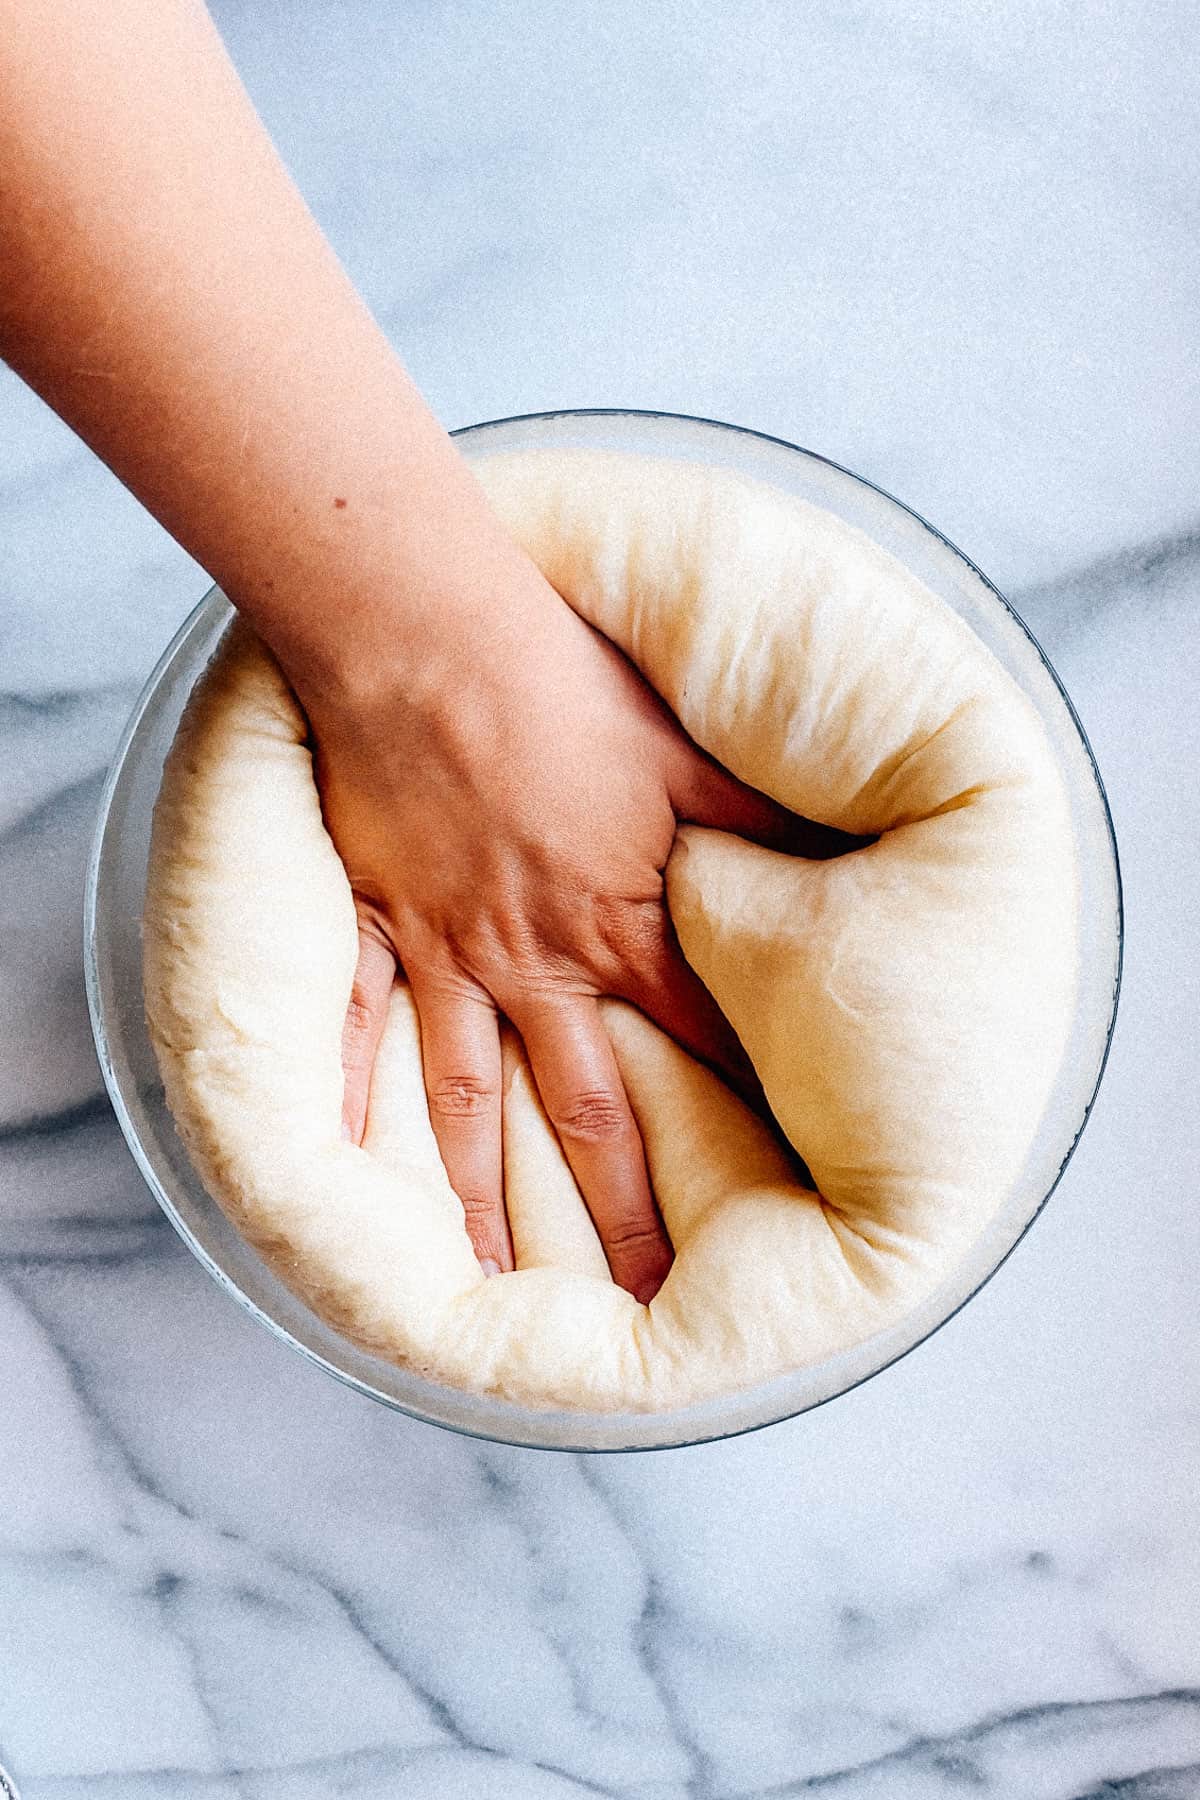
- Cover with cling wrap and set aside until doubled in size.
- This step is optional, but I'd highly recommend gently deflating, reshaping, then refrigerating the dough overnight after the first proof. Chilling the dough overnight develops more flavor and makes it a lot easier to work with the next day.
Roll and Cut:
- Lightly flour a working surface and place the dough. Gently knead, tap with a rolling pin, and divide into halves. Cover the piece you’re not using with cling wrap.
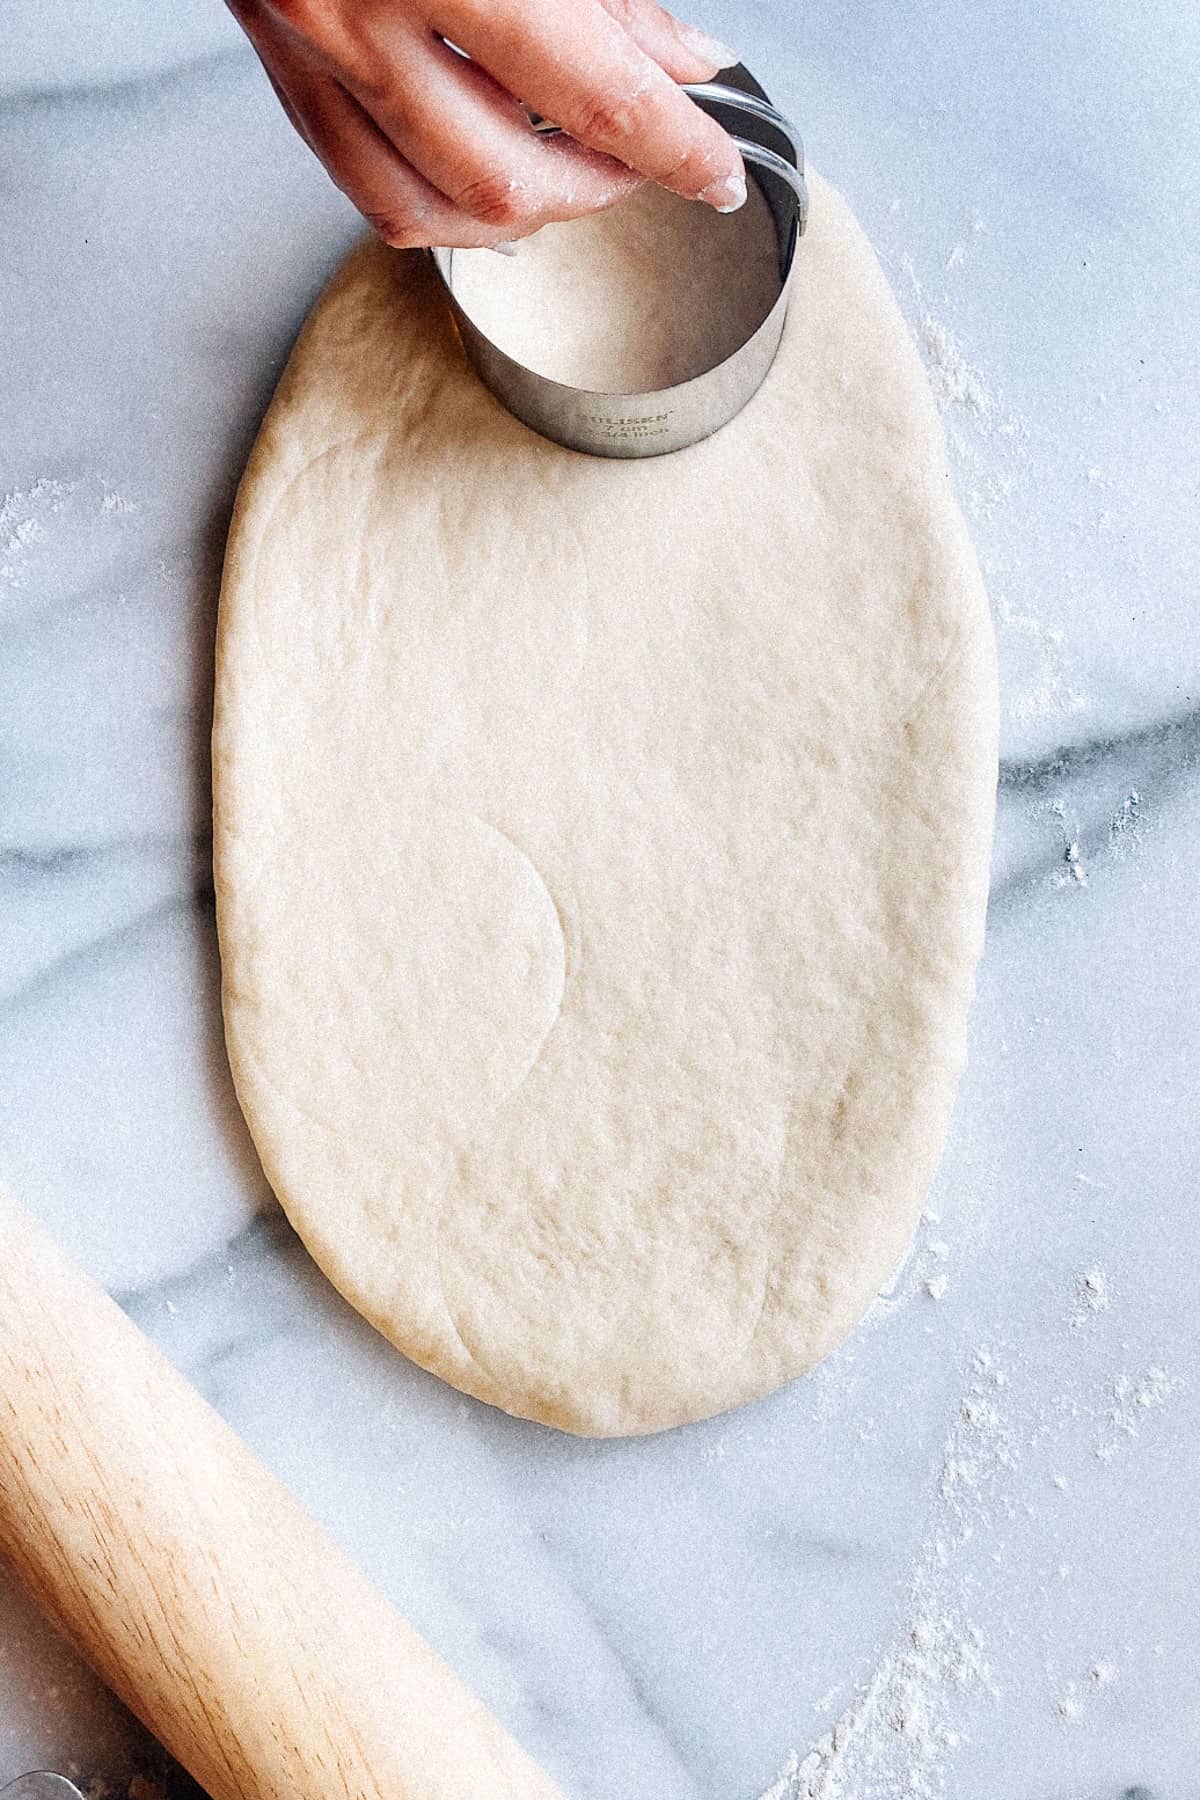
- Roll out the dough to ½” thickness and cut with a 3-inch, sharp doughnut or biscuit cutter. Make faint indentations with the cutter first to maximize the number of donuts.
- Re-roll the leftover dough, let rest for at least 30 minutes, and repeat—only once.
- You may also divide the dough into equal portions and roll them into smooth balls instead of cutting them. Some people also prefer to cut sufganiyot into squares.
Second Proof and Dry:
- Place each doughnut onto an individual small piece of parchment paper (4-in by 4-in) and place them onto baking sheets. Put the trays in an oven (that's off) and place a bowl of boiled water next to them. Close the oven door. The steam will prevent skin from forming on the donuts. Alternatively, you can cover the cut donuts with cling wrap.
- Repeat the cutting and proofing processes for the remaining piece of dough.
- Let the cut donuts rise for 15 minutes to an hour, depending on your kitchen's climate. Gently poke a cut piece of dough with your index finger and observe. If the indentation stays, your dough is properly proofed and ready to be fried. If the indentation immediately returns to the surface and disappears, you'll need to proof for longer.
- When the pieces are properly proofed, take them out of the oven (or remove cling wrap) to dry off the skin for a few minutes.
Fry:
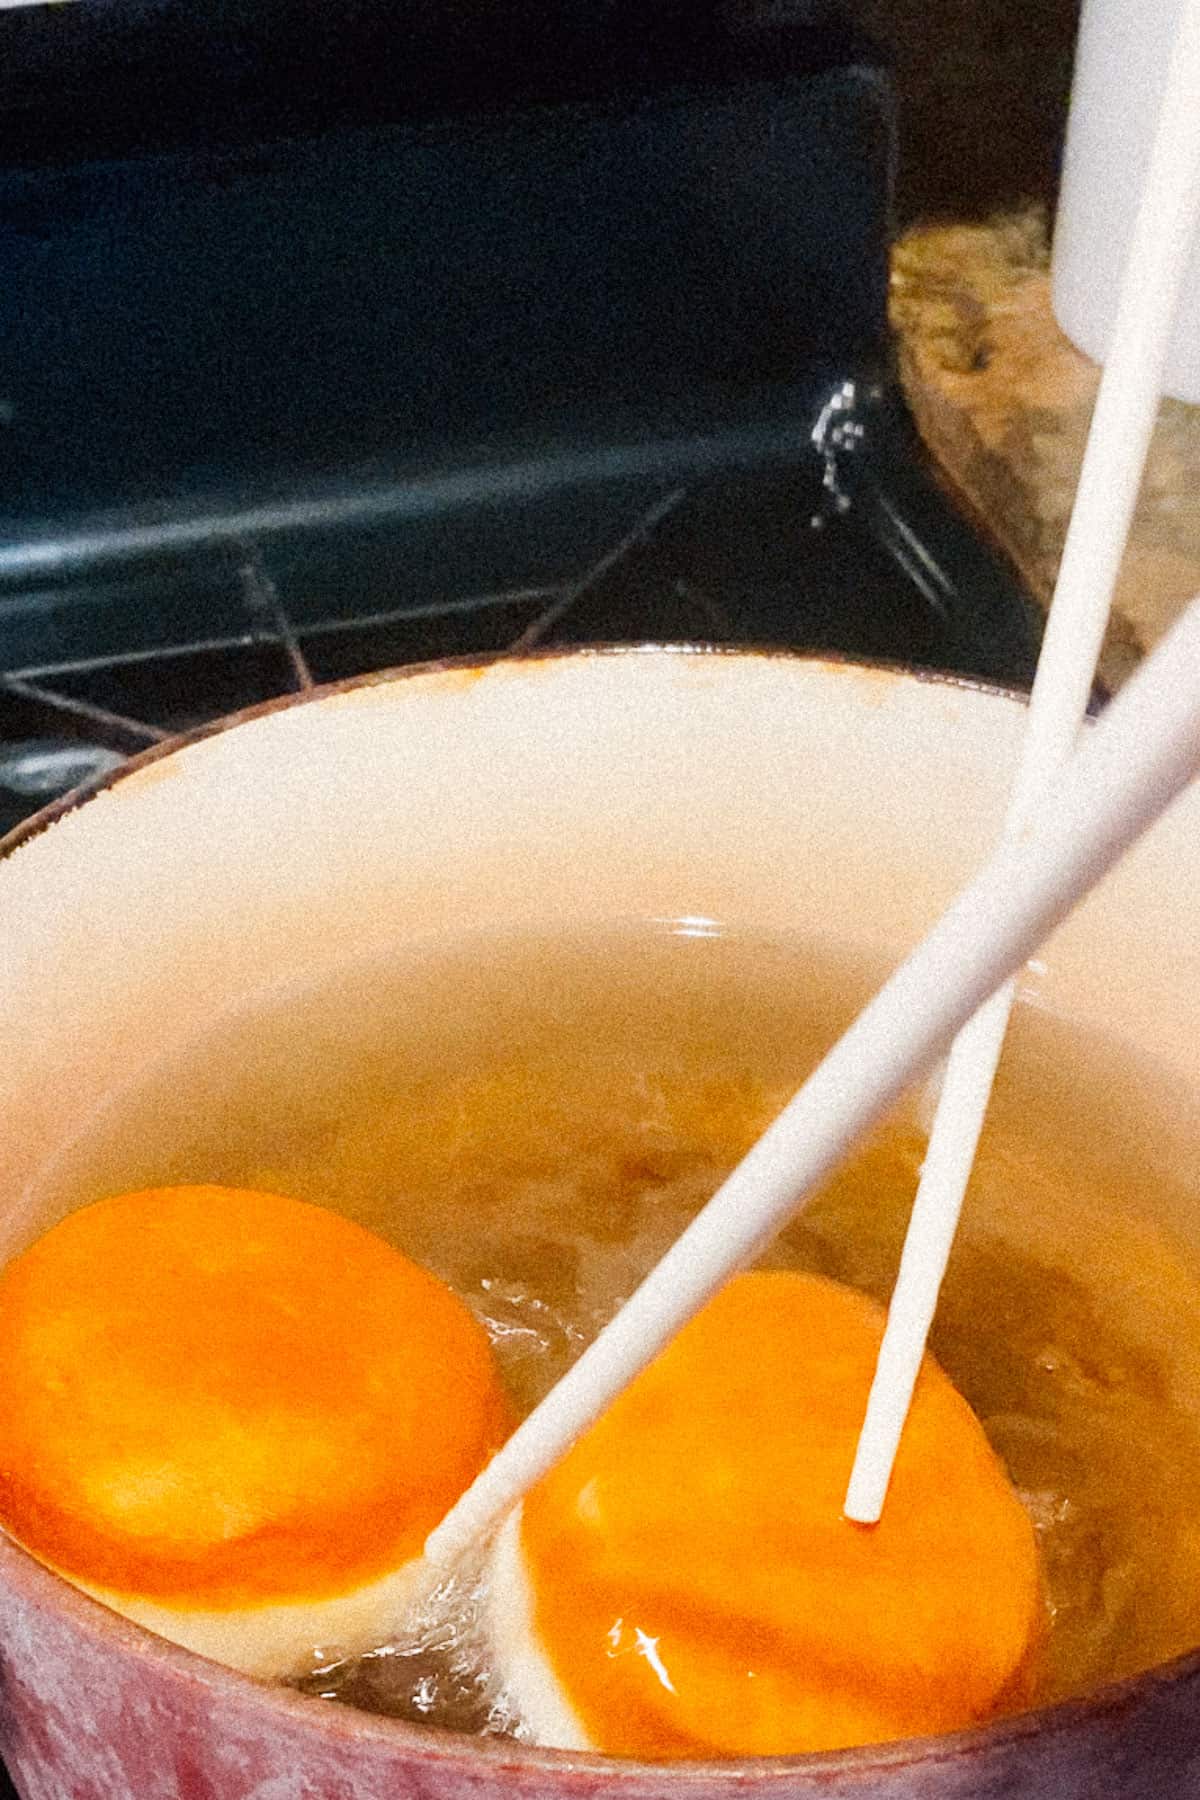
- Start heating the frying oil as soon as the first batch of dough is cut to minimize the chances of over-proofing. Pour vegetable oil into a heavy-bottomed pan at least 2-3 inches high and checking with a thermometer, heat to 375ºF.
- Test with a donut hole—they should turn golden brown in 30-45 seconds on each side. Make sure to start frying the batch you started proofing first.
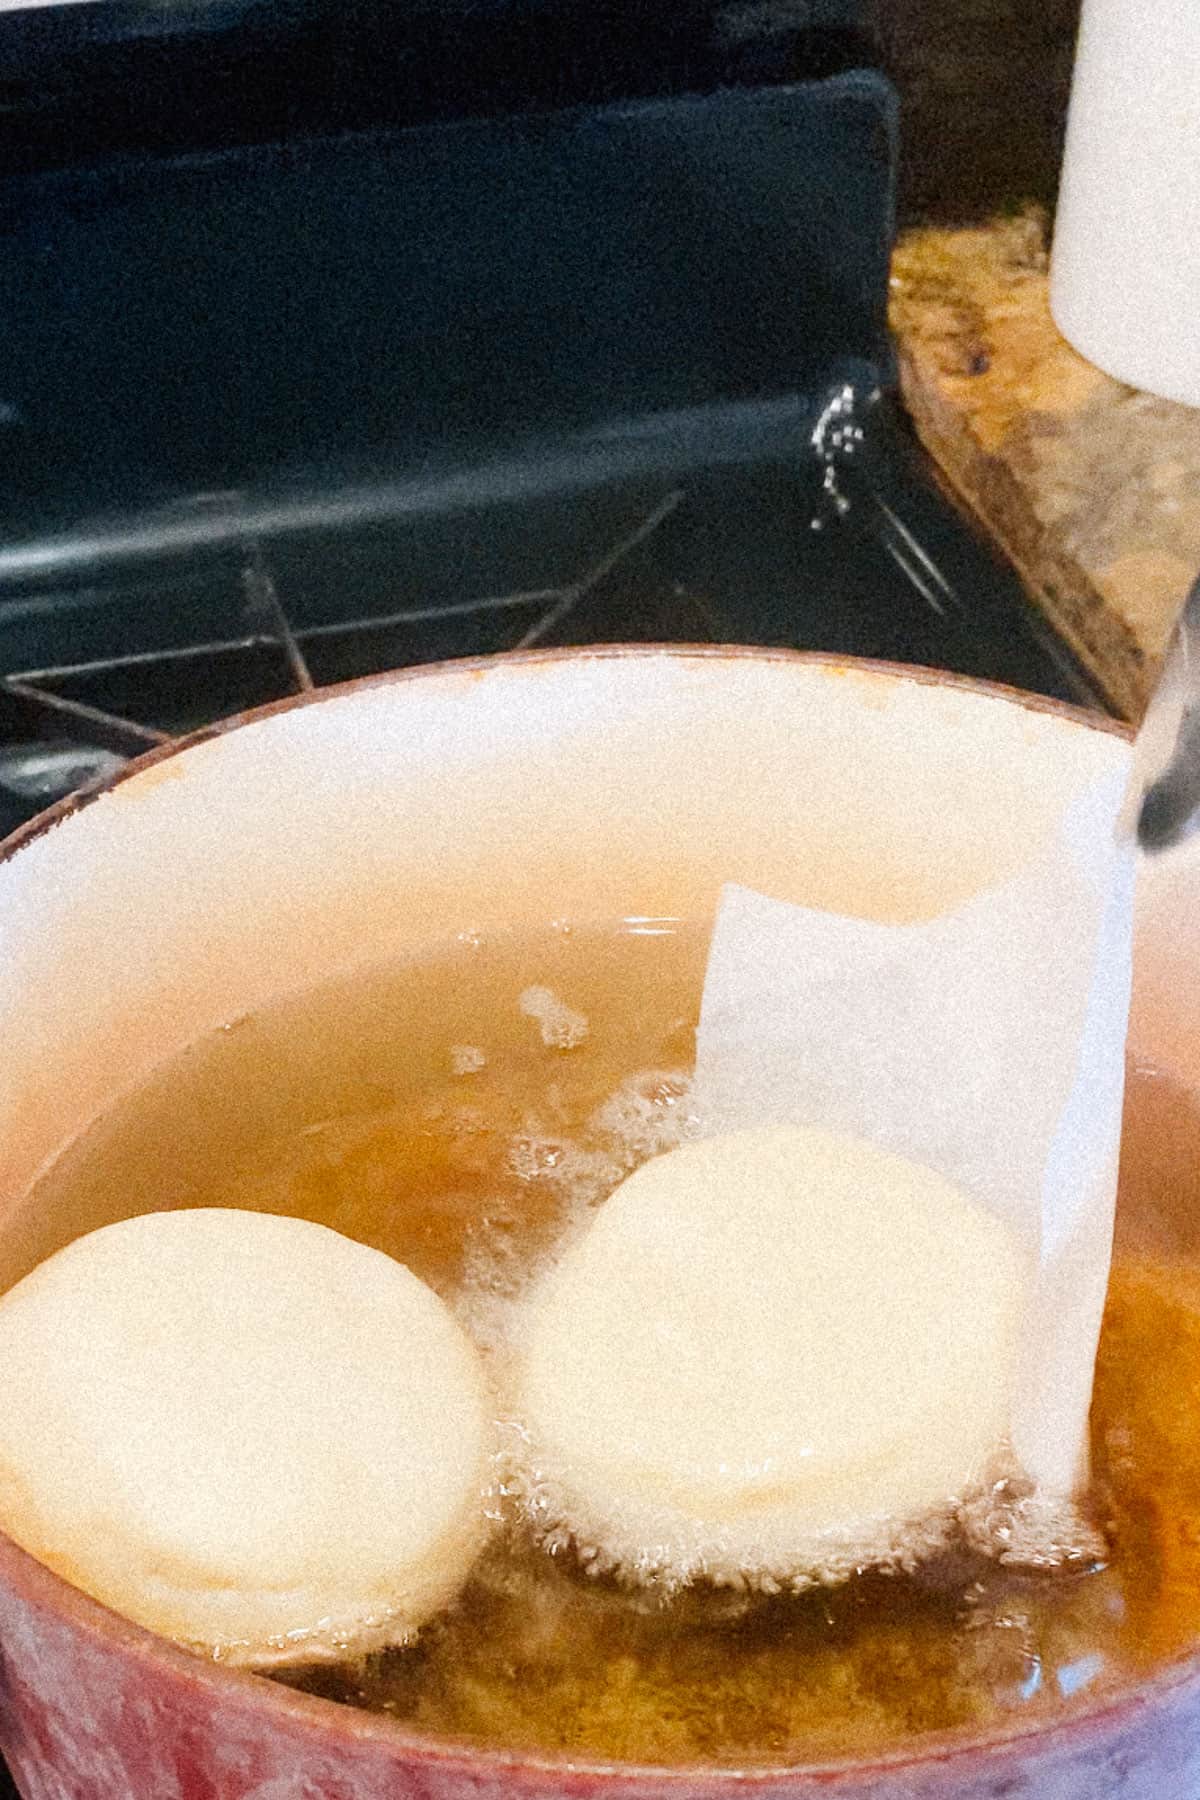
- Place 2 or 3 donuts into the frying pan at a time along with the parchment paper. Remove the parchment paper after a few seconds with tongs.
- Let the underside take on a golden brown color (about 45-60 seconds) then turn and fry the second side. Be conservative with the color: when the frying oil drains off the donut, it will seem darker. Chopsticks or a Danish dough whisk are very helpful when turning the donuts.
- Remove fried donuts with a steel mesh spider and transfer them onto paper towels. Let the donuts cool on a wire rack before filling & dusting them.
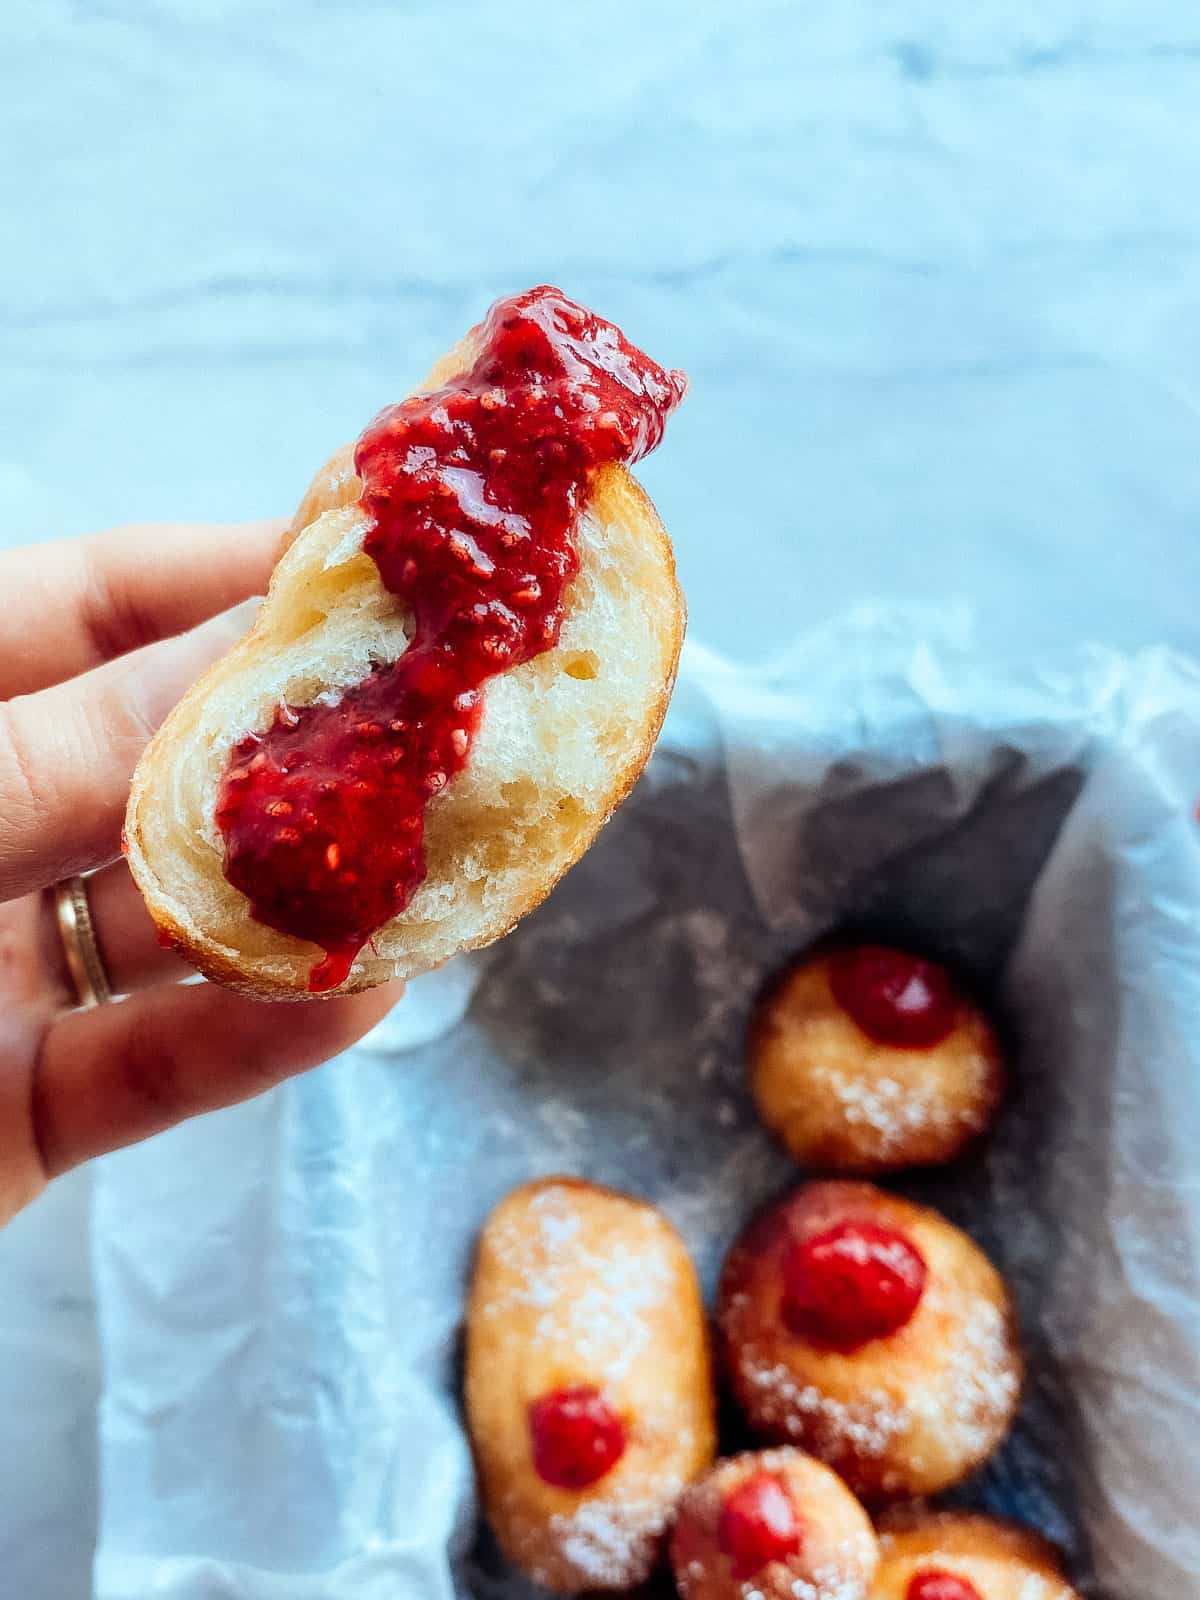
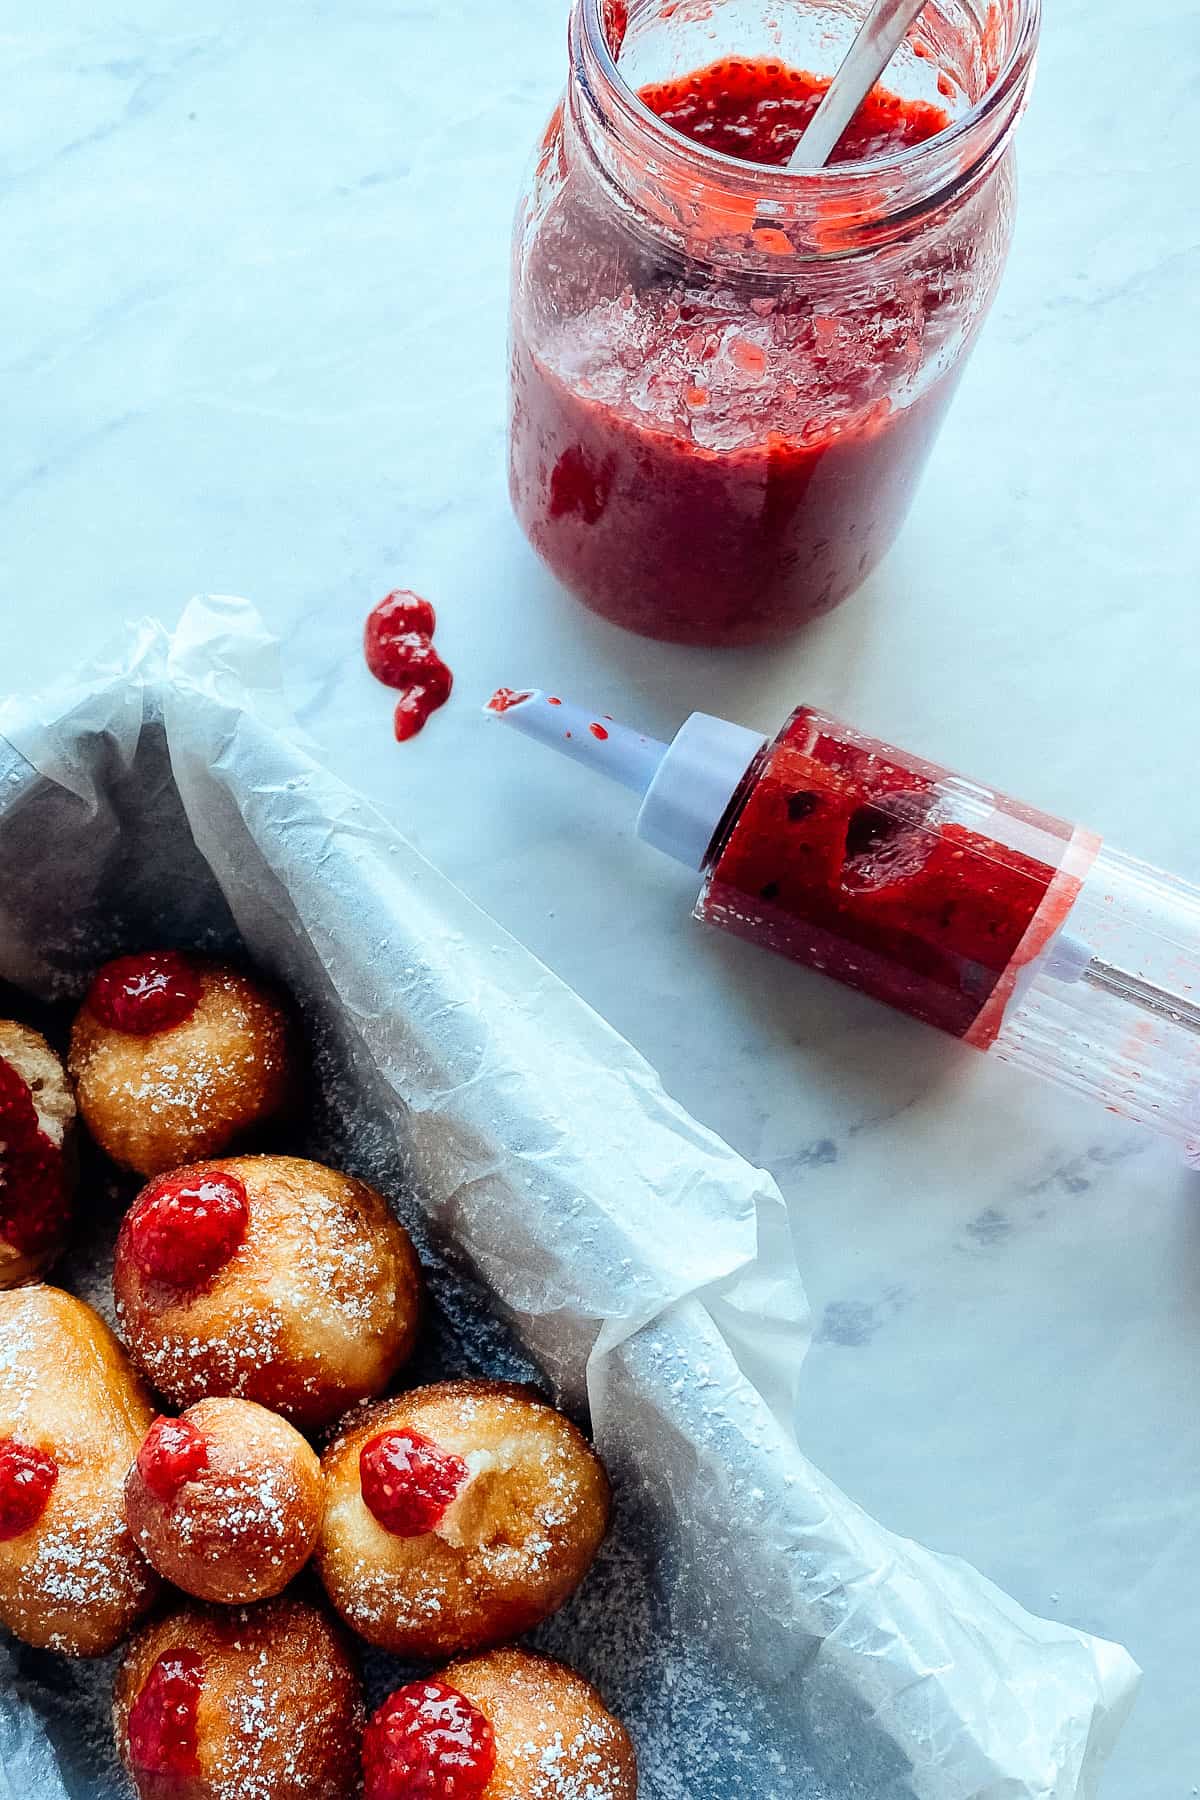
Fill the Donuts:
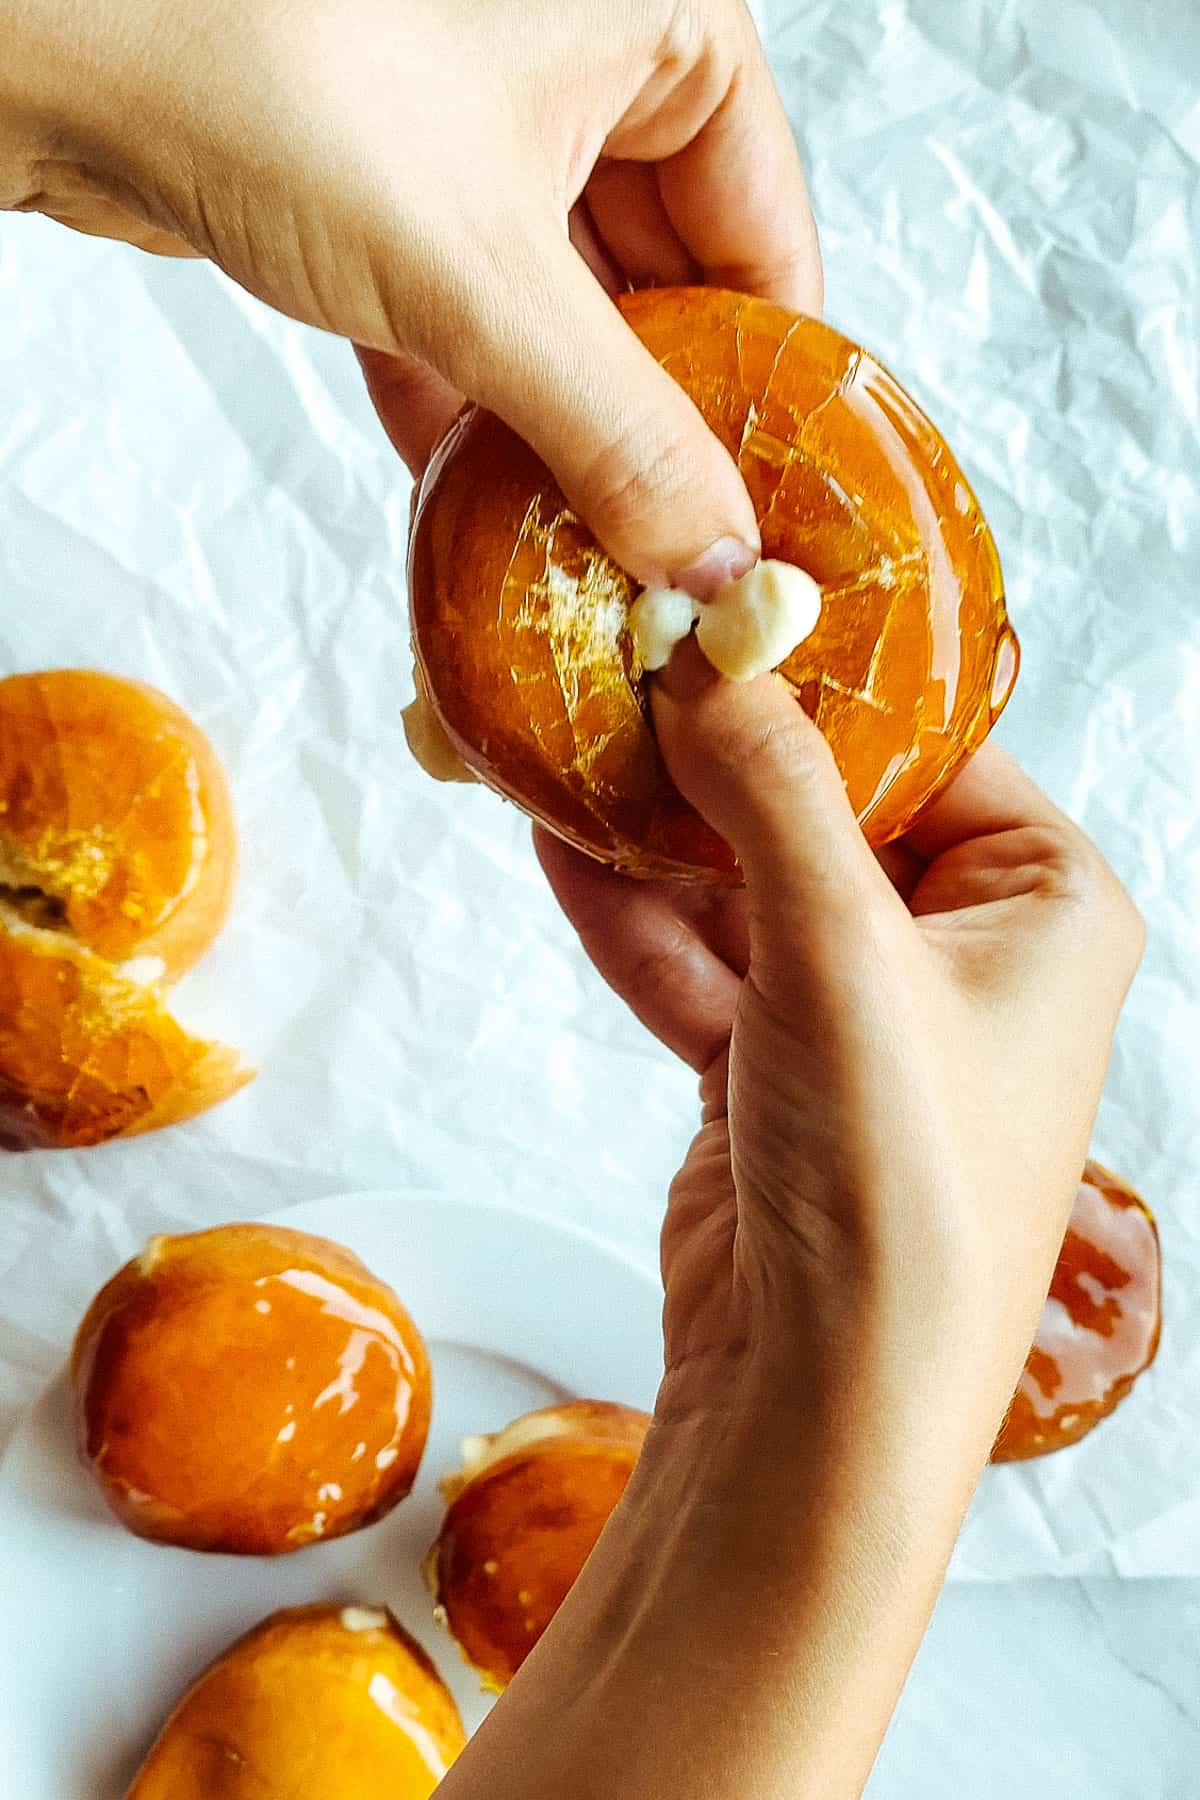
Once the donuts are cool enough to handle, poke a hole in the side using a chopstick. Move the chopstick around inside to make sure there's enough space for the filling.
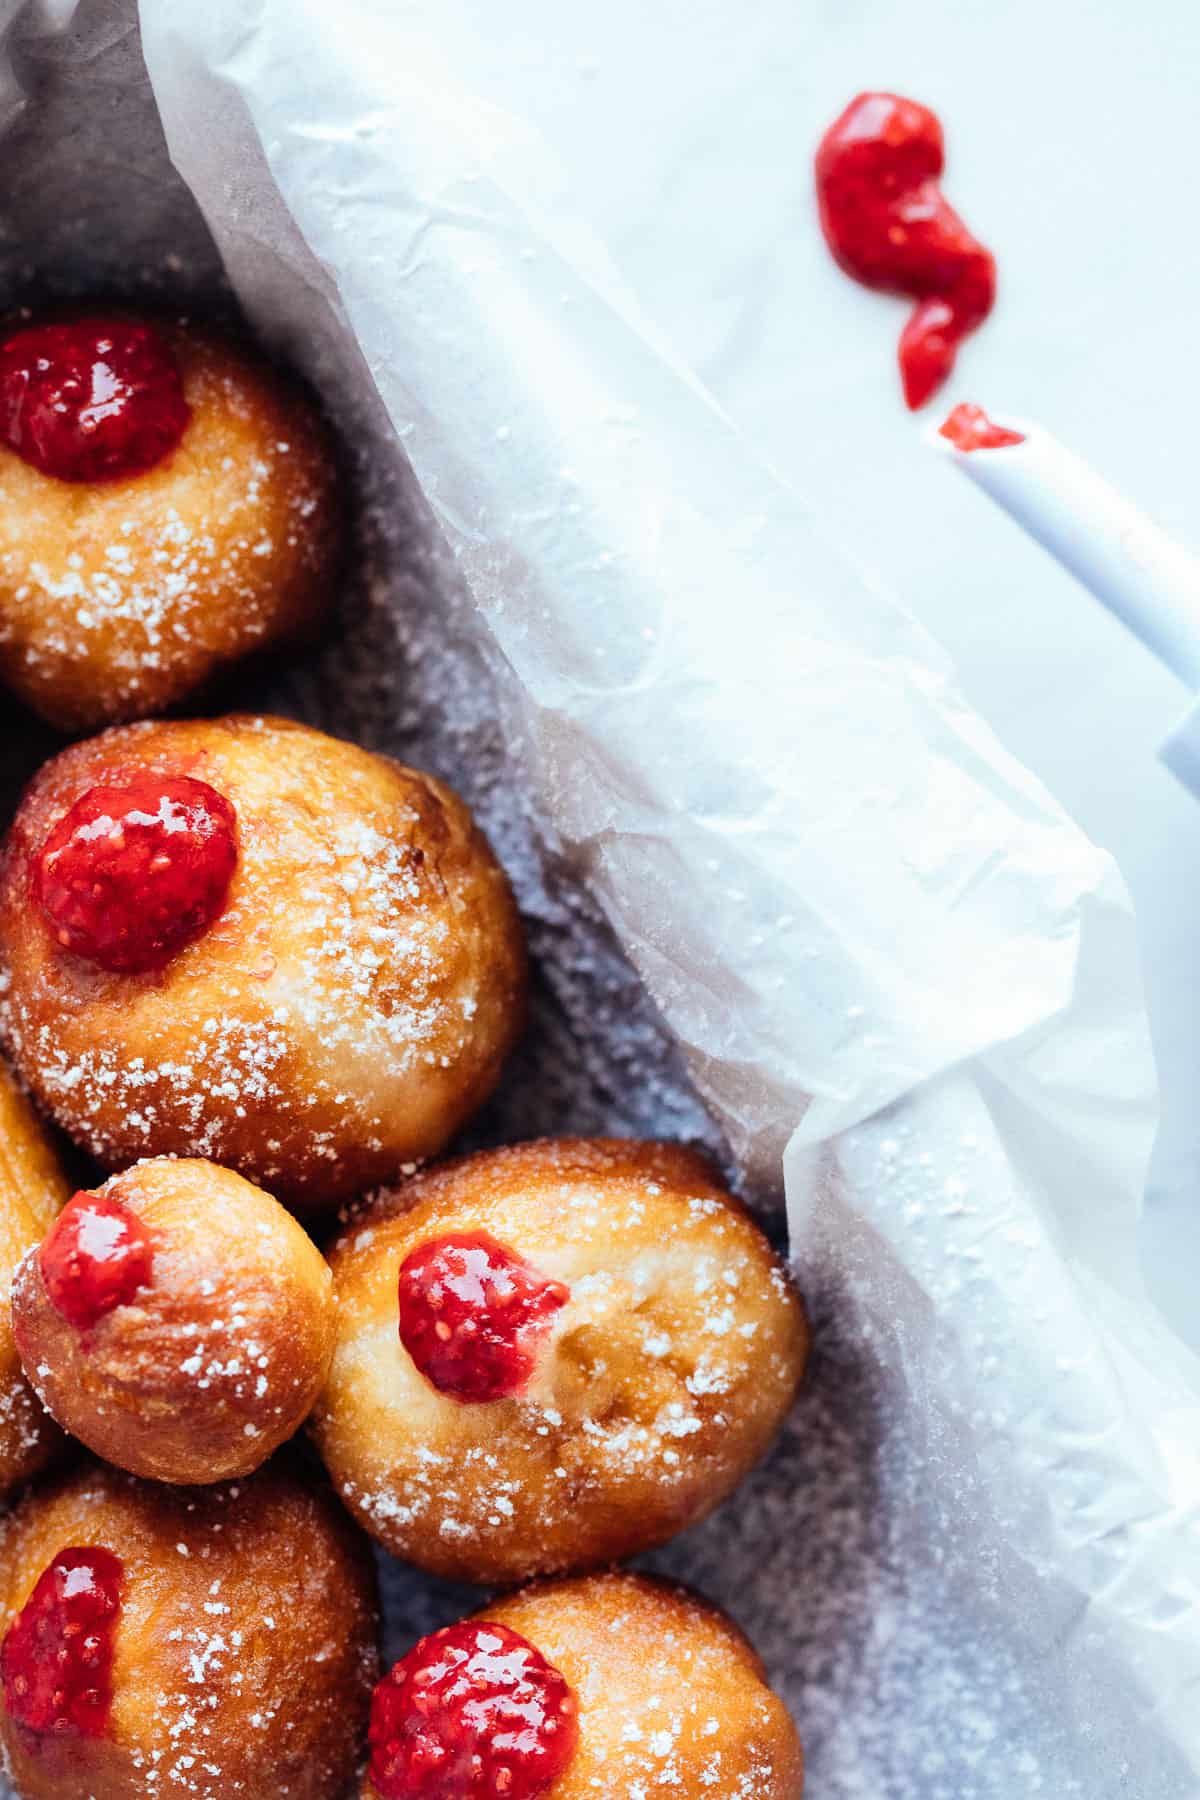
Pour your chia jam into a piping bag and fill the donuts. I use this reusable "cupcake injector" to make the process easier.
Ready to Serve:
Dust the filled doughnuts with powdered sugar and serve immediately. Enjoy!
💫 Tips
- These donuts are best enjoyed on the very same day you make them. To eat on the next day, make sure to fill & dust them right after cooling and keep it at room temperature in an airtight container. You may also freeze fried donuts individually and thaw, fill, and dust when ready to eat.
- The most important thing to remember is to use a scale! With as many ingredients and a yeasted dough, this is the only way to make sure you're following the recipe.
- Times for kneading and proofing are estimates. Go for the windowpane and poke tests to judge the next steps.
- For more raised donut recipe details and troubleshooting suggestions, check out this glazed yeast donut post.
🍩 Variations
Not a fan of jam? Try these delicious Boston cream donuts with a chocolate glaze instead!

OR make a real showstopper: crème brûlée doughnuts!
❓ FAQs
You may also have heard of jelly doughnuts being referred to as sufganiyot—which means donuts in Hebrew. Sufganiyah (singular-version) is a round jelly doughnut that originated in Israel. It's especially popular during Hanukkah!
The Israeli sufganiyot are traditionally raised and filled with jelly—or left plain.
Some chefs believe that a donut needs to be prepared a bit differently to truly be "sufganiyot"—using more yeast and cutting them into rectangles instead of circles.
They won't be the same. You also won't be able to fill cake doughnuts with jelly, but you can cut plain cake doughnuts horizontally into halves to spread the jelly that way.
Beignets are made with more yeast and fewer eggs, making them a little more puffy in the middle than regular doughnuts. Additionally, beignets are cut into rectangles instead of the classic circular doughnut shape.
Usually, no. Although the jam is generally vegan, the yeast-risen dough often contains dairy and/or eggs. You can find vegan sufganiyot at some vegan donut shops (such as Donut Friend in Los Angeles). You can also easily make homemade, veganized jelly donuts!
Check out this master post on troubleshooting yeasted doughnuts.
Did you make this vegan jelly doughnuts recipe? I'd love to hear about it! Please comment and leave a star🌟 rating below. This helps me run Aegean Delight and I always appreciate it 🙂
Print📖 Recipe
Vegan Jelly Doughnuts (Sufganiyot)
- Total Time: 5 hours
- Yield: 16 (3-inch) Donuts 1x
- Diet: Vegan
Description
These raised vegan jelly doughnuts are filled with strawberry chia jam and dusted with powdered sugar! Super soft yet chewy, these vegan sufganiyot are perfect to serve during Hanukkah!
Ingredients
Doughnut:
- scant ½ cup (100 ml) aquafaba
- 3 tablespoons (22.5 g) cornstarch
- 2 teaspoons (5 g) instant yeast
- scant ½ cup (100 ml) water, lukewarm
- pinch of sugar (to mix with yeast)
- 4 cups (500 g) all-purpose flour
- ⅓ cup (65 g) sugar
- 1 teaspoon (6 g) table salt
- ⅔ cup (165 ml) soy milk
- ⅓ cup (80 g) vegan butter, at room temperature
- 3+ cups vegetable oil for frying
Jelly Filling:
- berry chia jam (use full recipe, or 2 cups store-bought jelly)
Dusting:
- ⅓ cup powdered sugar
Instructions
Make the Egg Replacer:
- Mix the aquafaba with cornstarch and set aside.
Bloom the Yeast:
- Mix the yeast with lukewarm water and 1 teaspoon of sugar; set aside until frothy.
Knead and First Proof:
- Place all dry ingredients (flour, sugar, salt) into a large bowl and make a well in the center. Pour in the aquafaba & cornstarch mixture, soymilk, and yeast mixture.
- Mix with a wooden spoon until the dough somewhat comes together. If you want an easier time kneading, let this coarse mixture rest for 30 minutes to autolyze.
- Knead for 10 minutes by hand until smooth, or 5 minutes with dough hook with a stand mixer. Add the softened vegan butter and knead for another 2 minutes to combine.
- Tear a piece of the dough and check if it passes the windowpane test. When the dough is stretched, you should be able to see light through it without the dough tearing. Otherwise, keep kneading to form more gluten bonds.
- Cover with cling wrap and set aside until doubled in size.
- This step is optional, but I'd highly recommend gently deflating, reshaping, then refrigerating the dough overnight after the first proof. Chilling the dough overnight develops more flavor and makes it a lot easier to work with the next day.
Roll and Cut:
- Lightly flour a working surface and place the dough. Gently knead, tap with a rolling pin, and divide into halves. Cover the piece you’re not using with cling wrap.
- Roll out the dough to ½” thickness and cut with a 3-inch, sharp doughnut or biscuit cutter. Make faint indentations with the cutter first to maximize the number of donuts.
- Re-roll the leftover dough, let rest for at least 30 minutes, and repeat—only once.
- You may also divide the dough into equal portions and roll them into smooth balls instead of cutting them.
Second Proof and Dry:
- Place each doughnut onto an individual small piece of parchment paper (4-in by 4-in) and place them onto baking sheets. Put the trays in an oven (that's off) and place a bowl of boiled water next to them. Close the oven door. The steam will prevent skin from forming on the donuts. Alternatively, you can cover the cut donuts with cling wrap.
- Repeat the cutting and proofing processes for the remaining piece of dough.
- Let the cut donuts rise for 15 minutes to an hour, depending on your kitchen's climate. Gently poke a cut piece of dough with your index finger and observe. If the indentation stays, your dough is properly proofed and ready to be fried. If the indentation immediately returns to the surface and disappears, you'll need to proof for longer.
- When the pieces are properly proofed, take them out of the oven (or remove cling wrap) to dry off the skin for a few minutes.
Fry:
- Start heating the frying oil as soon as the first batch of dough is cut to minimize the chances of over-proofing. Pour vegetable oil into a heavy-bottomed pan at least 2-3 inches high and checking with a thermometer, heat to 375ºF.
- Test with a donut hole—they should turn golden brown in 30-45 seconds on each side. Make sure to start frying the batch you started proofing first.
- Place 2 or 3 donuts into the frying pan at a time along with the parchment paper. Remove the parchment paper after a few seconds with tongs.
- Let the underside take on a golden brown color (about 45-60 seconds) then turn and fry the second side. Be conservative with the color: when the frying oil drains off the donut, it will seem darker. Chopsticks or a Danish dough whisk are very helpful when turning the donuts.
- Remove fried donuts with a steel mesh spider and transfer them onto paper towels. Let the donuts cool on a wire rack before filling them with jelly.
Fill & Dust the Doughnuts:
- Once the donuts are cool enough to handle, poke a hole in the side using a chopstick. Move the chopstick around inside to make sure there's enough space for the filling.
- Pour your jelly into a piping bag or injector and fill the doughnuts through the hole.
- Dust powdered sugar over the doughnuts and enjoy!
Notes
If possible, please use a scale.
These doughnuts are best enjoyed on the very same day you make them. To eat on the next day, make sure to fill them right after cooling and keep them at room temperature in an airtight container. You may also freeze fried donuts individually and thaw & fill them when ready to eat.
Times for kneading and proofing are estimates. Go for the windowpane and poke tests to judge the next steps.
Nutrition information is an estimate.
- Prep Time: 1 hour
- Proof Time: 3 hours and 30 minutes
- Cook Time: 30 minutes
- Category: Dessert
- Method: Fry
- Cuisine: Universal
Nutrition
- Calories: 265

Comments
No Comments